Day-19 Creating Attack Diagram
Alright folks, buckle up! We’ve built our very own SOC playground – Windows and Ubuntu servers, a humming ELK stack, agents deployed, Sysmon watching like a digital hawk, and sweet dashboards visualizing everything. Now comes the fun part (in a totally ethical way, of course): planning an attack on our own servers!
Why Play Attacker?
Ever heard the saying “know your enemy”? Well, in cybersecurity, the enemy is the sneaky hacker trying to breach your defenses. By planning an attack ourselves, we gain valuable insights. It’s like playing chess – anticipating your opponent’s moves to fortify your own strategy.
Here’s the deal: without a plan, an attacker is just flailing in the dark. They wouldn’t know where they are in the attack chain, what’s working, and what needs tweaking. In this task, we’ll craft a step-by-step plan, channeling our inner (friendly) attacker, to understand how they might launch a brute force attack on our precious servers.
Introducing Draw.io: Our Attack Planning Canvas
Think of Draw.io as our digital whiteboard for plotting this (completely ethical) attack. We’ll use it to map out each stage, visualizing the steps a real attacker might take.
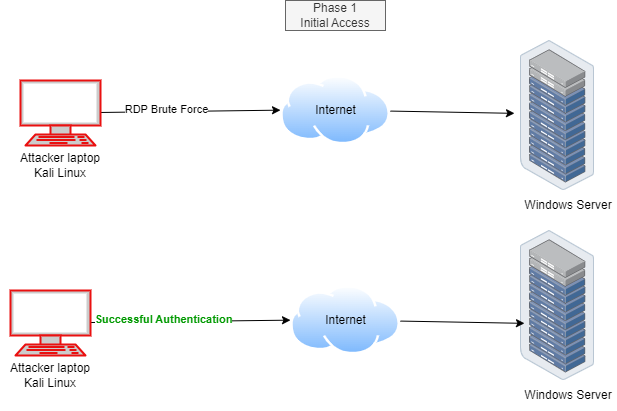
Phase 1: Initial Access
Our villain, the attacker, is using Kali Linux, a hacker’s playground. They’re starting by brute forcing the Windows server, basically guessing passwords until they hit the jackpot.
Let’s imagine they’ve cracked the code and successfully logged into the Windows server.
Now the fun begins!
Phase 2: Discovery
Once they’ve successfully breached the castle walls (or, in digital terms, logged in), the hacker’s next move is to scout the land. They’ll use commands like whoami, ipconfig, and net user to gather intel on your system. Think of it as a digital reconnaissance mission, helping them decide where to strike next.

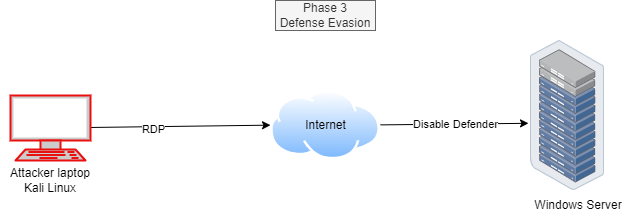
Phase 3: Defense Evasion
Attackers are sneaky little critters! To avoid getting caught, they often try to disable Windows Defender and other security measures. This way, they can sneak around undetected and carry out their malicious activities without raising any alarms.
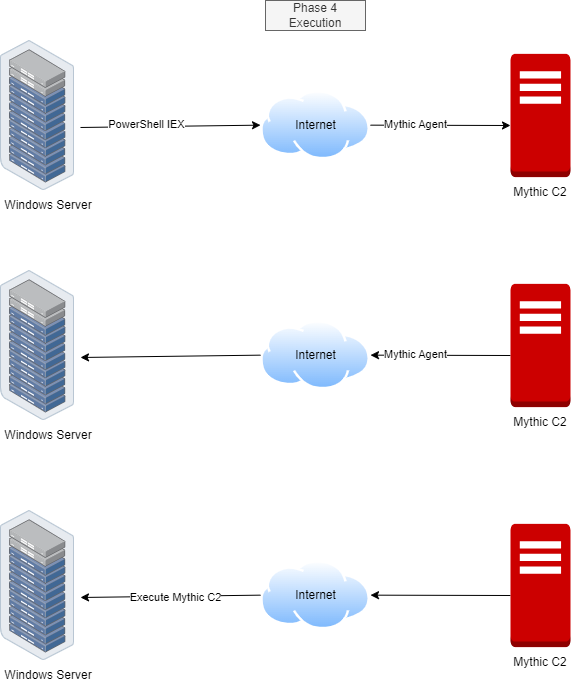
Phase 4: Execution
Now, let’s get this show on the road! The attacker has successfully infiltrated our target Windows server. Their first order of business? To establish a secret communication channel with their C2 server. And guess what? We’re using the popular, open-source Mythic C2 server for this sneaky operation.
Imagine the C2 server as the attacker’s secret lair. Once it connects to the Windows server, it’s like the hacker’s puppet master pulling the strings. The C2 server will send commands to the infected Windows server, demanding information and control. Let’s see what tricks the attacker has up their sleeve!
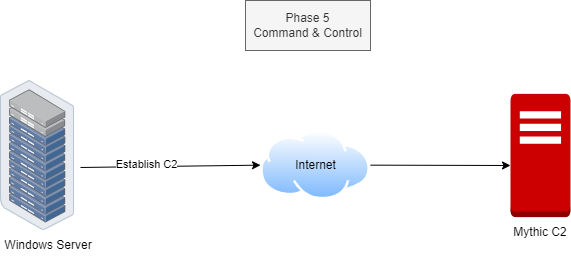
Phase 5: Command & Control
The C2 server is now controlling our Windows server, sending it commands to steal data, install malware, or launch attacks. It’s like a digital villain plotting to take over our virtual world.
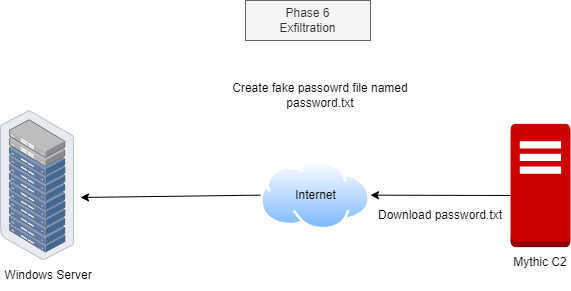
Phase 6: Exfiltration
In this phase, we’ll set up a decoy password file on the Windows server to trick the Mythic C2 server. The attacker will be lured into downloading this fake file, thinking it’s a treasure trove of interesting secrets.
We just wrapped up a quick crash course on how attackers plan their attacks.
Confused about the order of operations? Don’t worry, the MITRE ATT&CK framework and Cyber Kill Chain have got your back.
In our next blog, we’ll put these skills to the test with a hands-on attack simulation. Stay tuned!