Day-25 osTicket and ELK integration
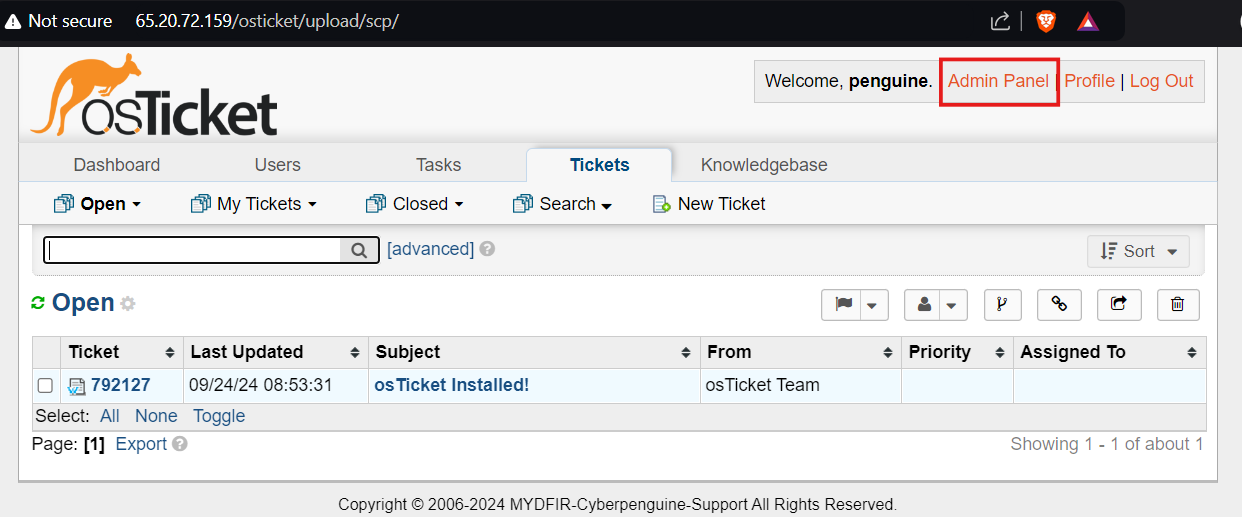
Today, we’re wrapping up our environment setup for SOC investigations. We’ll integrate osTicket with ELK. Let’s start the instances, log into osTicket’s Admin Panel, and get started.
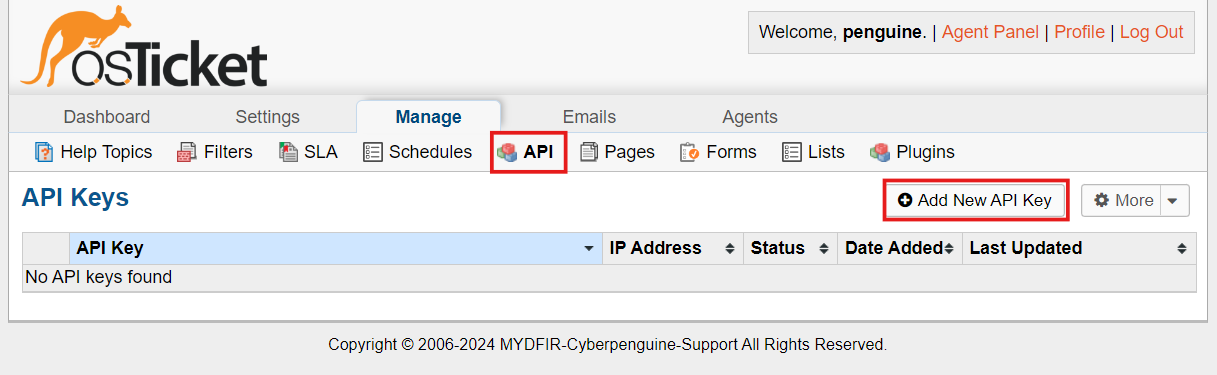
Click on Manage option.

You’ll see the API option there. Click on it, and then click on ‘Add New API Key’.
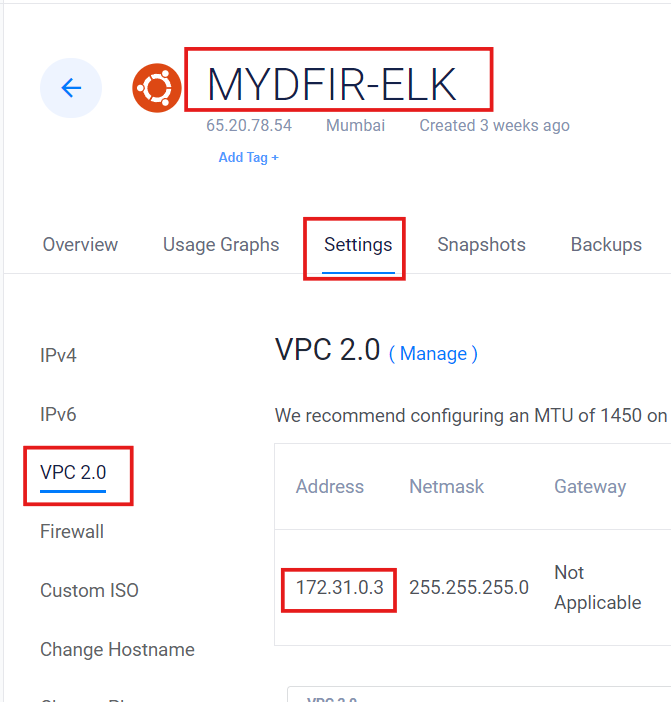
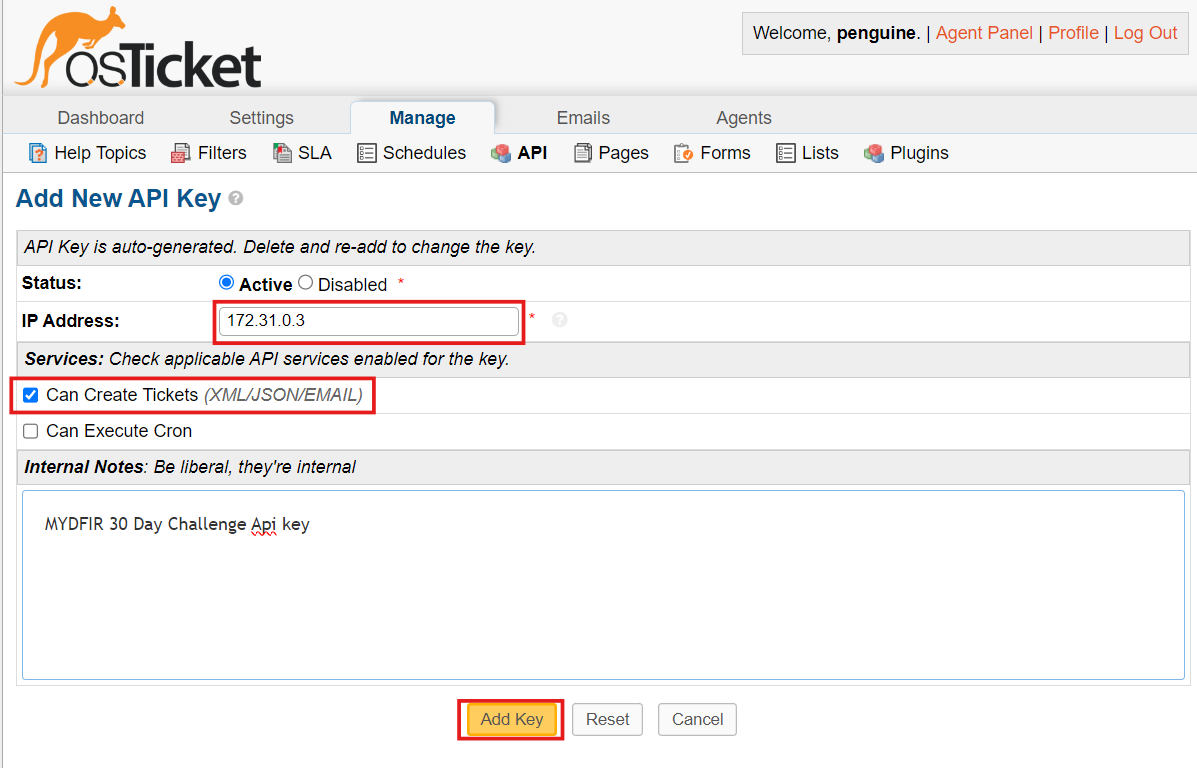
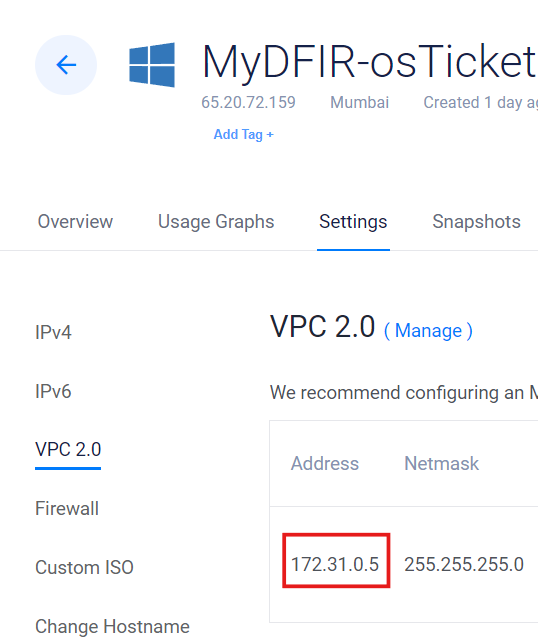
To create an API, we’ll need the private IP address of our ELK instance. You can find this by going to Settings > VPC 2.0 and copying the IP address.
Paste the IP address in the IP address field, check the box that says ‘Can create ticket,’ provide a description, and click ‘Add key’.
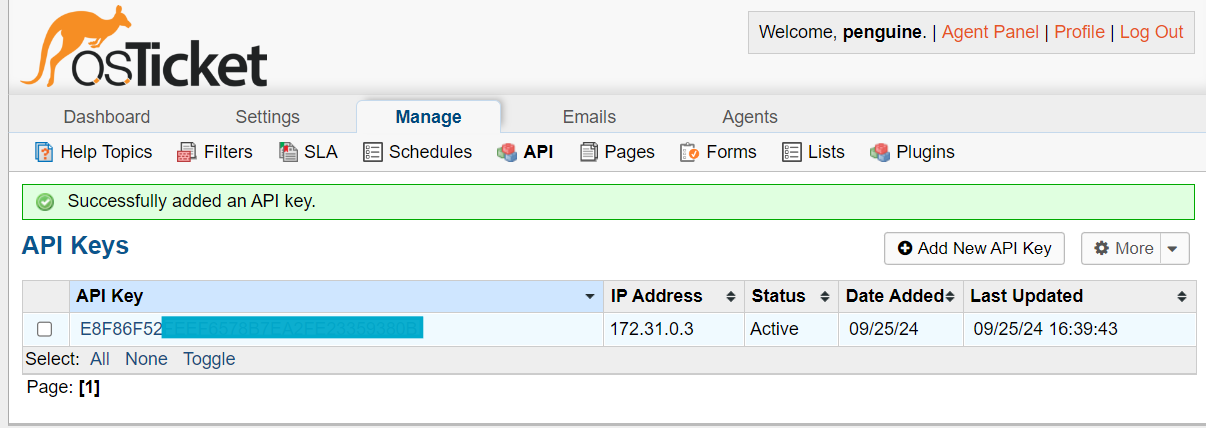
In Manage tab you’ll see the API key generated.
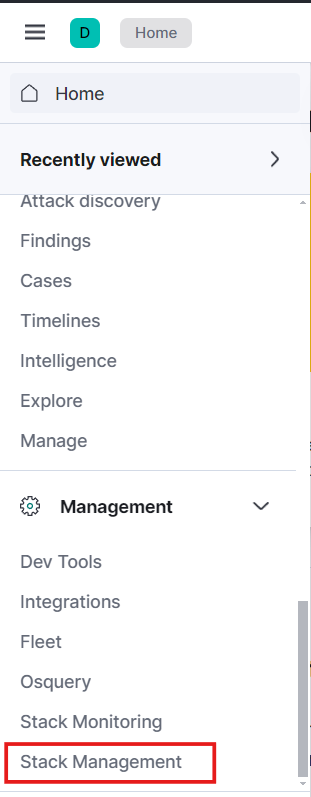
Now, log in to Elastic with your credentials. From the hamburger menu icon, navigate to the Management section and select Stack Management.
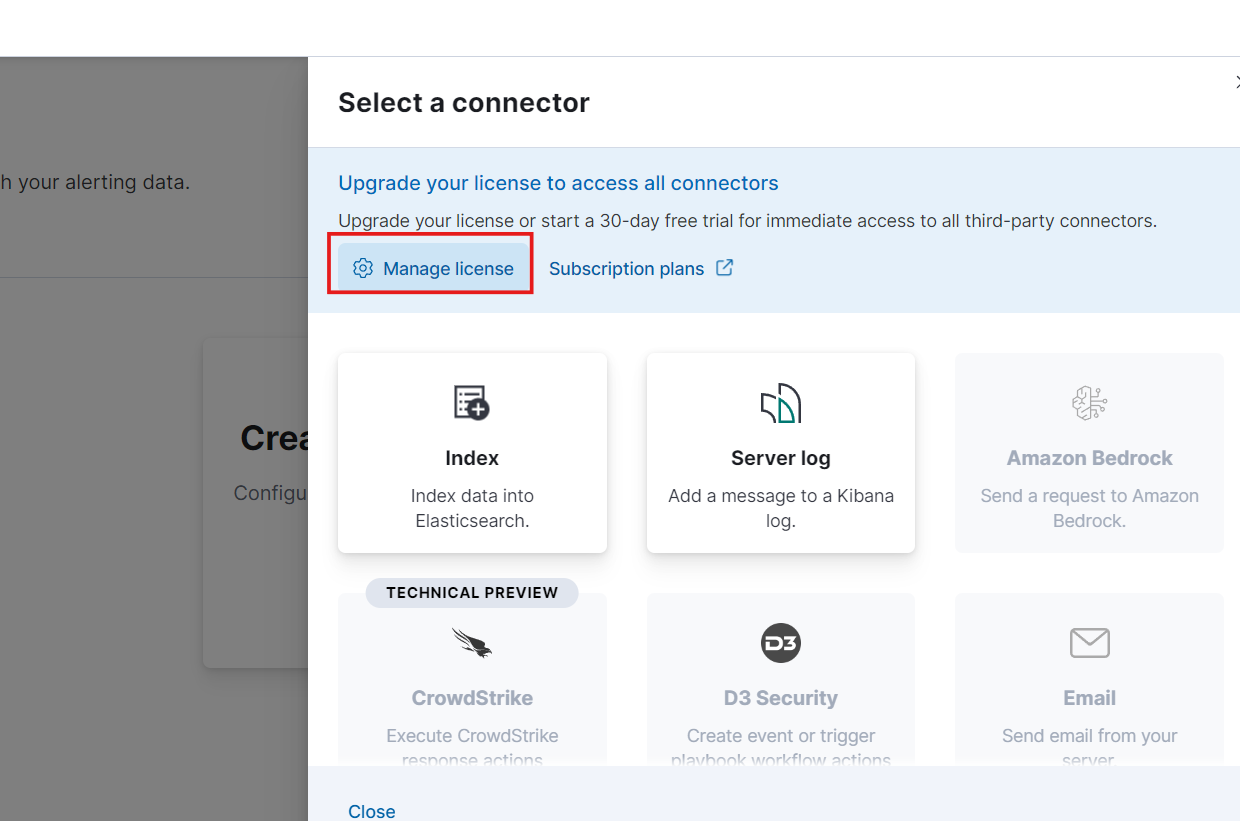
To access all the options under ‘Create Connector’ in the ‘Alerts and Insights’ section, you’ll need to start a 30-day free trial. Click on ‘Manage License’ to begin the trial.
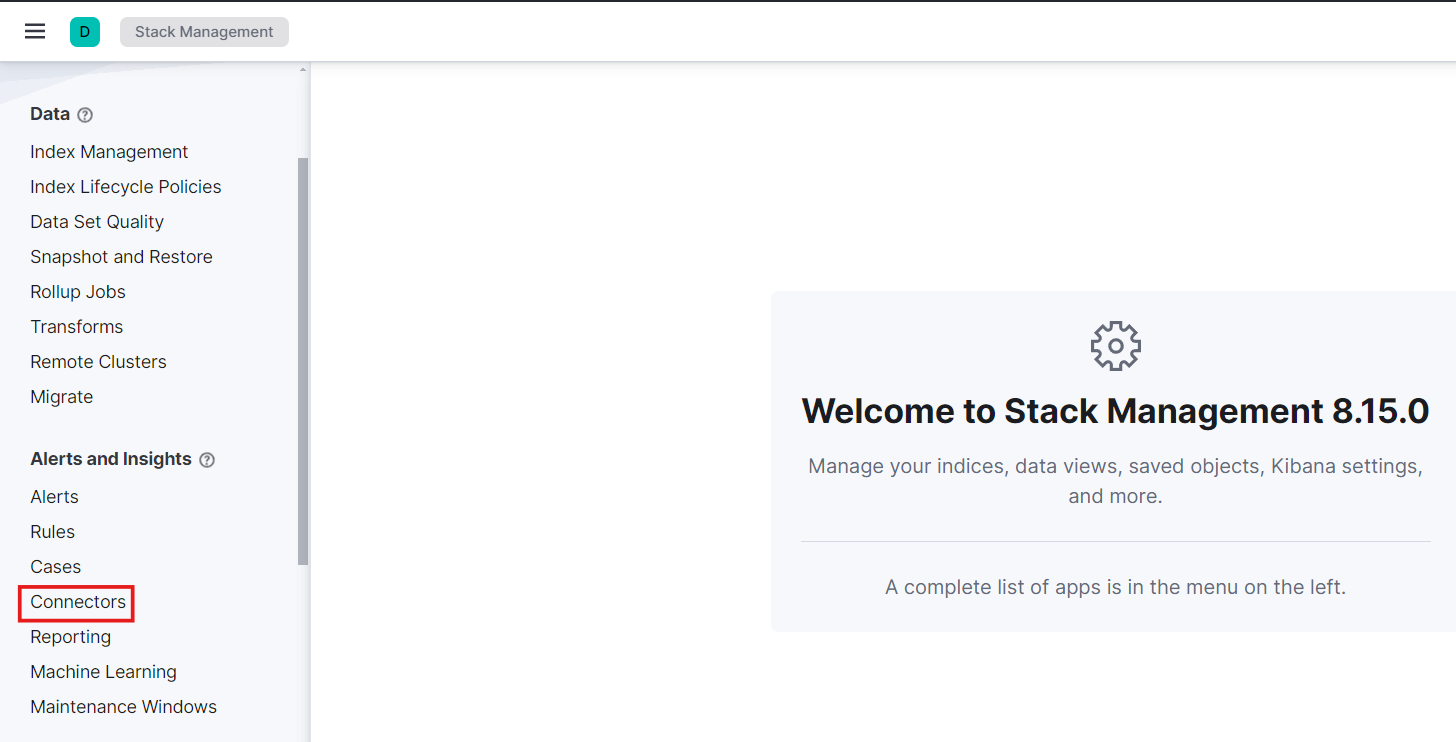
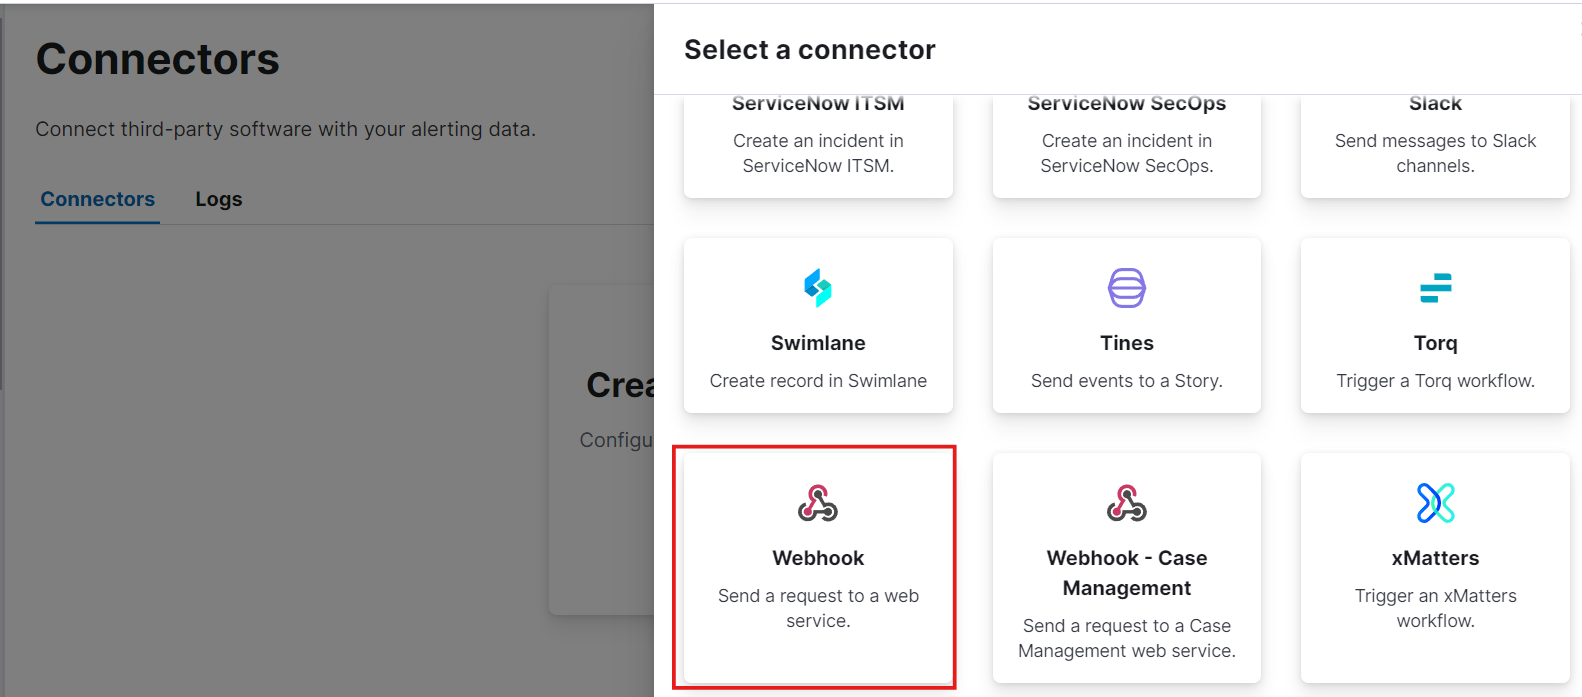
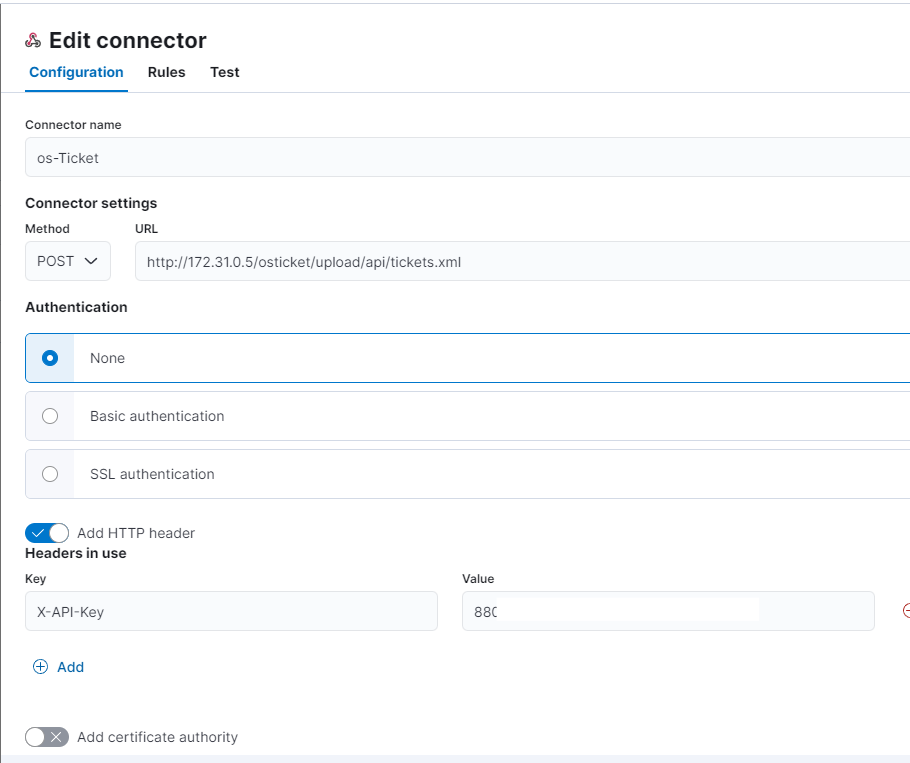
Next, go to Connectors. To create a new connector, we’ll use a webhook, which will send requests to a web service.
Let’s get started! First, give your connector a name. Then, use a POST request with the correct URL for your OSticket instance. For now, we’ll skip authentication. Next, add an HTTP header and include your API key.
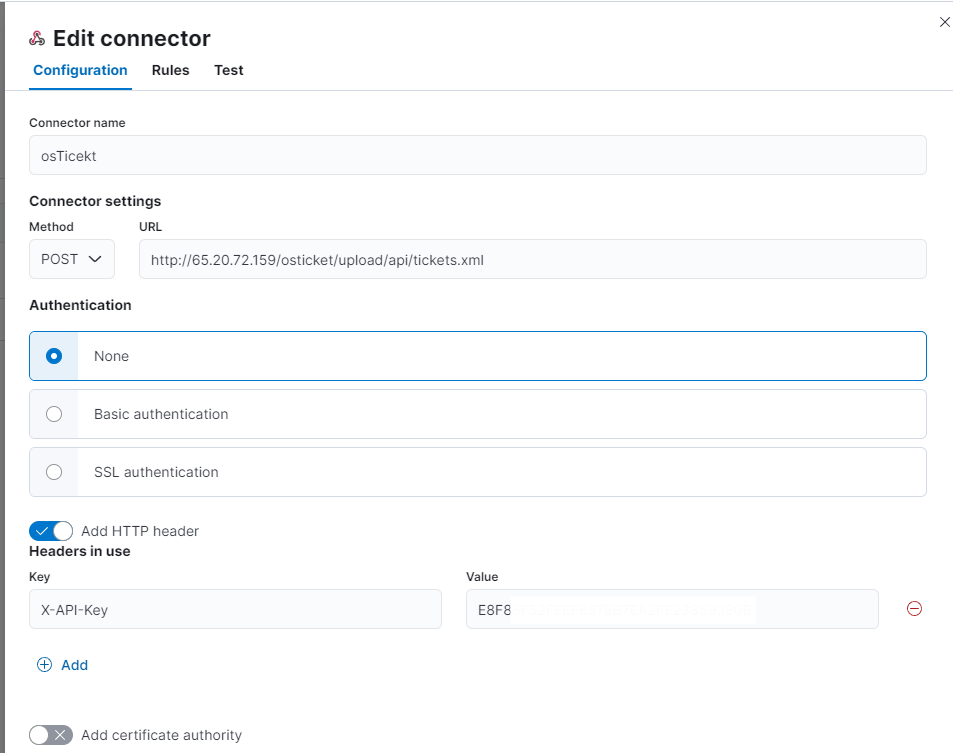
Remember to save your configuration after making any changes. The changes won’t take effect automatically unless you save them.

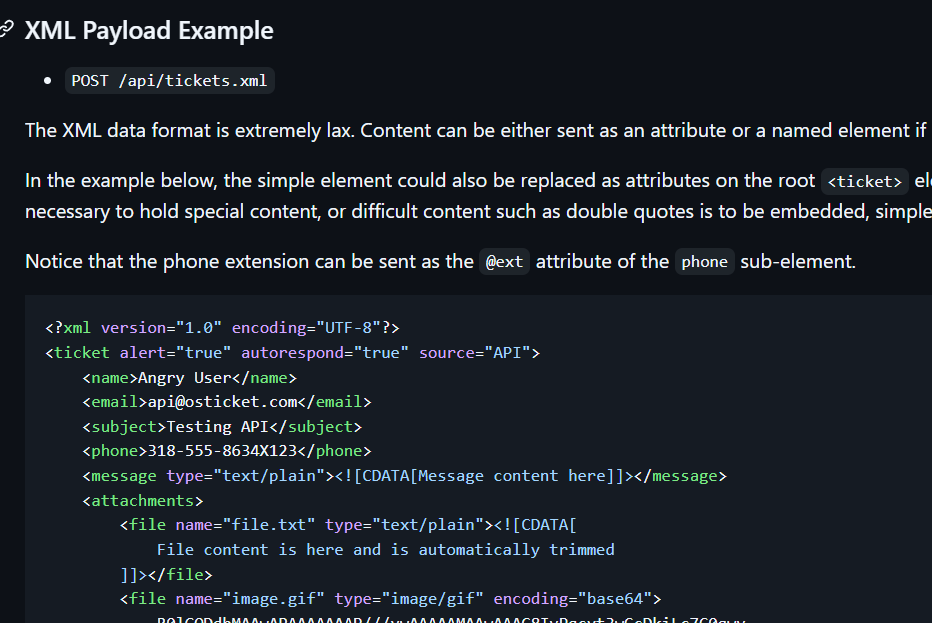
Next up, we’ll need an XML payload for the body. Head over to the osTicket GitHub page to grab a pre-made XML body. Copy and paste it into the body field, and feel free to change the subject if you want. Keep everything else the same unless you have a reason to change it.
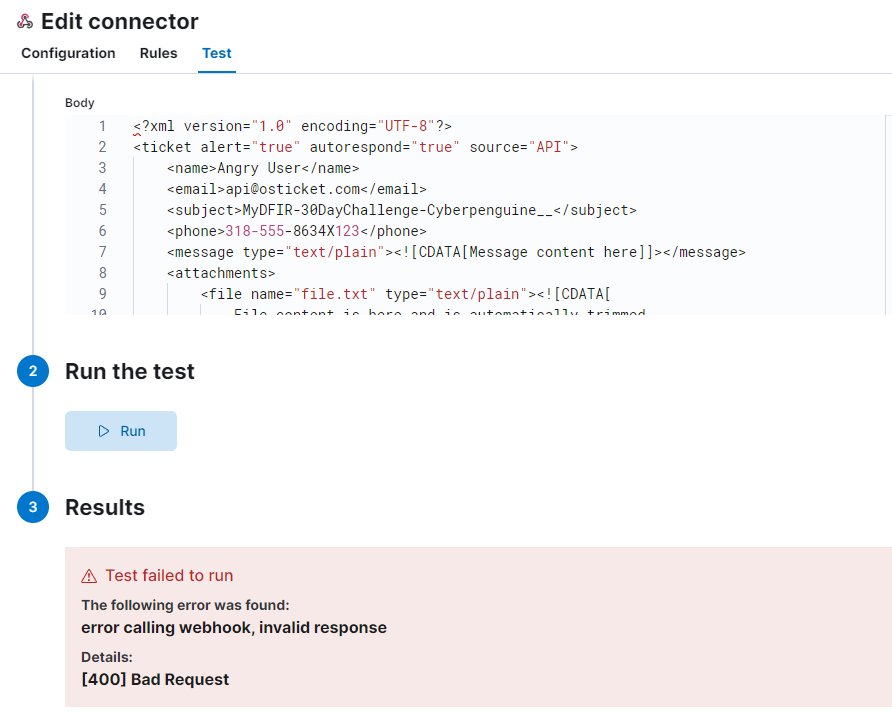
Our test failed with a bad request. Let’s figure out what went wrong. First, let’s try pinging our OSticket server using its private IP from the ELK server to see if it’s accessible.
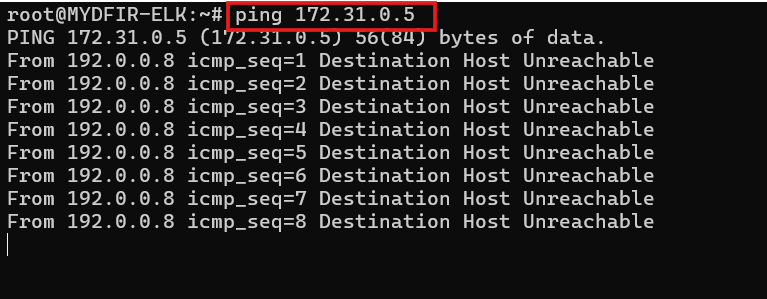
Looks like we’re having some connectivity issues. We can’t access it from the ELK server. Let’s head over to the OSticket server to troubleshoot. You can find the OSticket server’s IP address using the ipconfig command.
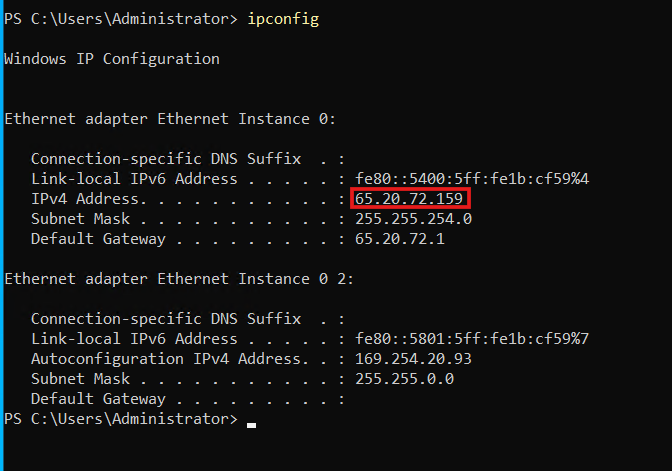
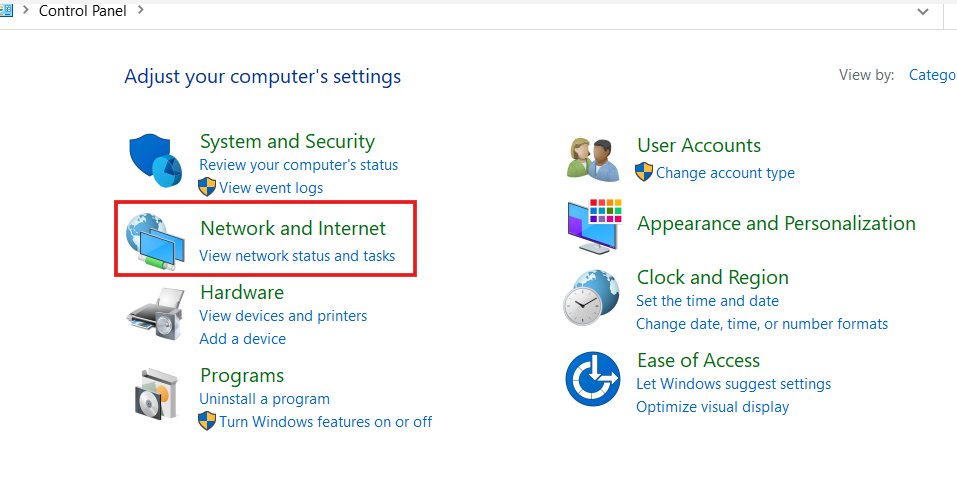
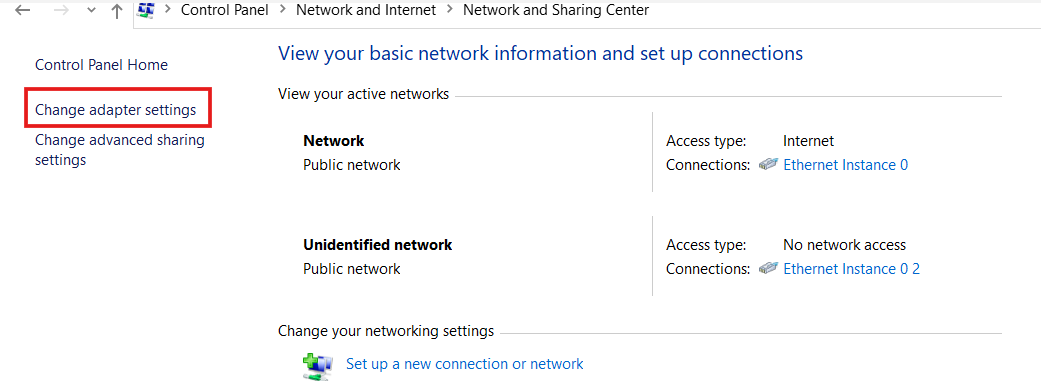
We see our public IP address, but the private IP is missing. Let’s change that private IP from the Control Panel. Head to Network and Internet, then click on ‘Change adapter settings.
Identify the network adapter you want to change, excluding any with public IP addresses. Modify the adapter’s IP address to match the private IP of your OSticket server, and then save the changes.
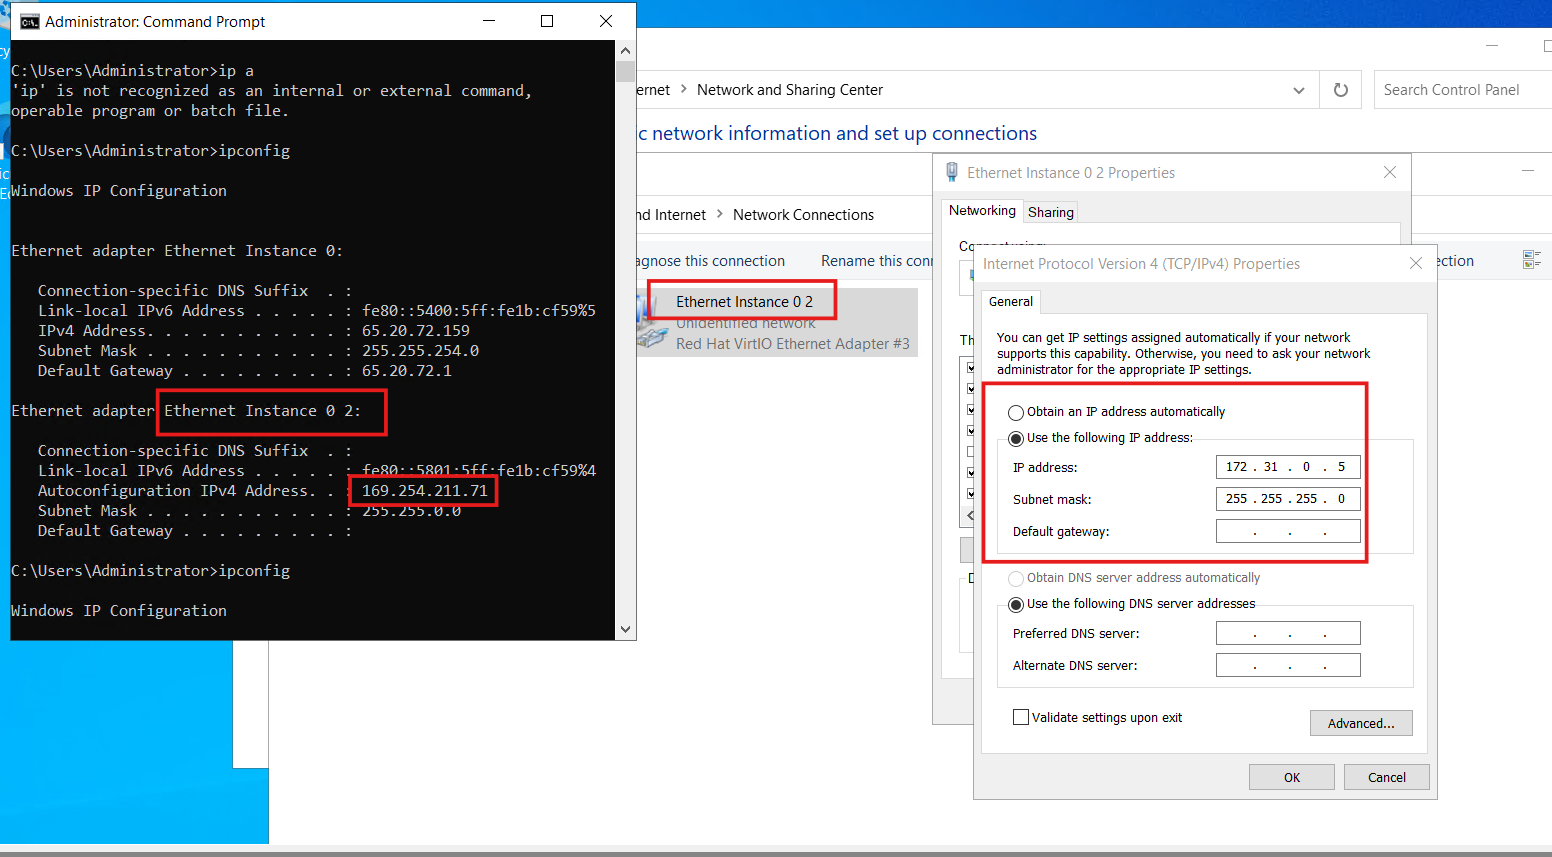
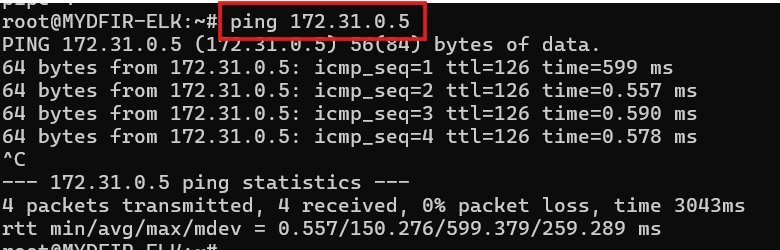
Confirm by running the ipconfig command again.
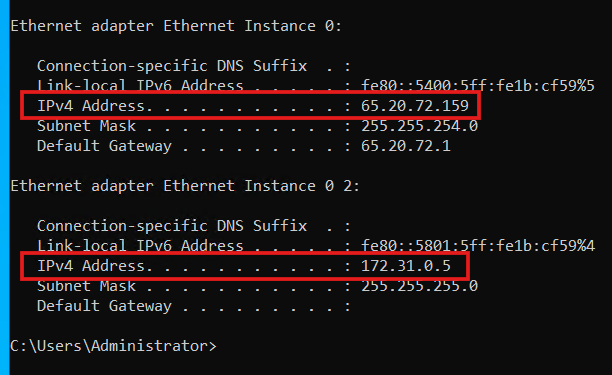
As shown in the screenshot, the private IP address has been updated, and we can successfully ping it from the ELK server.
Let’s modify the IP address in the POST URL of the connector and then rerun the test after saving the changes.
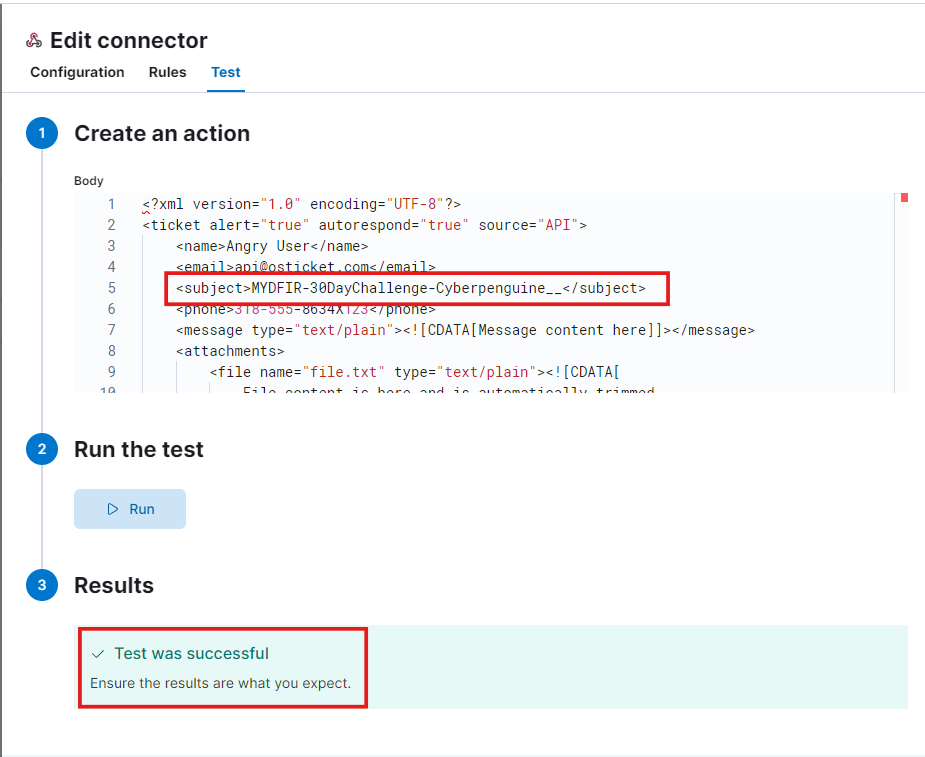
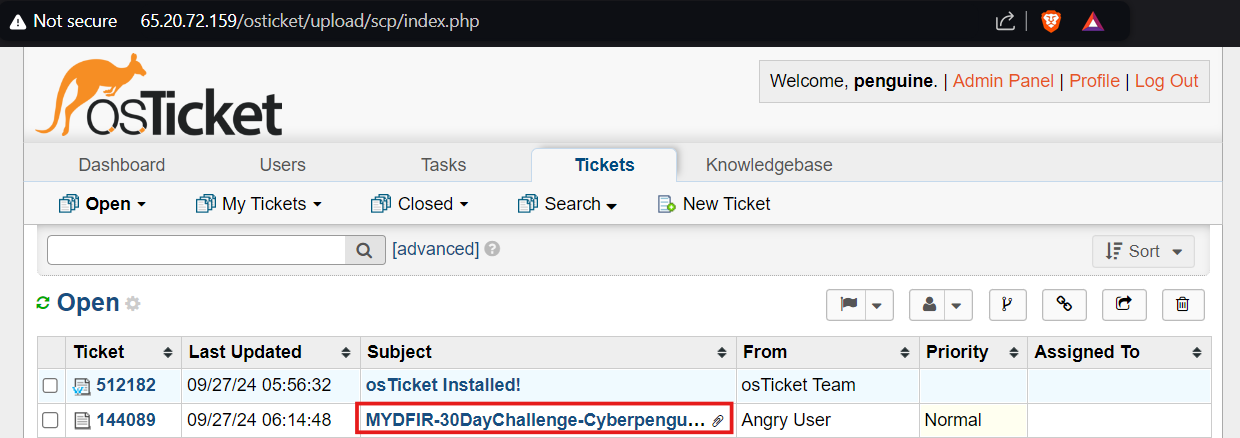
Success! The integration was a breeze. Head over to the OSticket Agent Panel to see the newly created ticket with the subject name we updated in the XML payload body. It’s a small victory, but it’s a step in the right direction!
We’ve successfully completed our environment setup. Stay tuned for more!