Day-28 Investigate Mythic Agent
In this blog, we’ll dive deep into the Mythic Agent. Let’s log into Elastic and start our investigation. Go to the recently viewed menu (the hamburger icon) and select the dashboard you created specifically for the Mythic Agent.
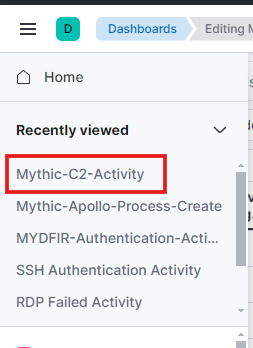
Previously, we created visualizations for process creation, process initialization, and Windows Defender disabled.
Let’s focus on process initialization. You’ll notice an executable file we created earlier.
To investigate, ask yourself: Why is an executable system file located in the C:\Users\Public\Downloads\ path?
In this case, we know the file name. But in reality, we wouldn’t. So the question becomes: Why is an executable file initiating a process from the C:\Users\Public\Downloads\ path?

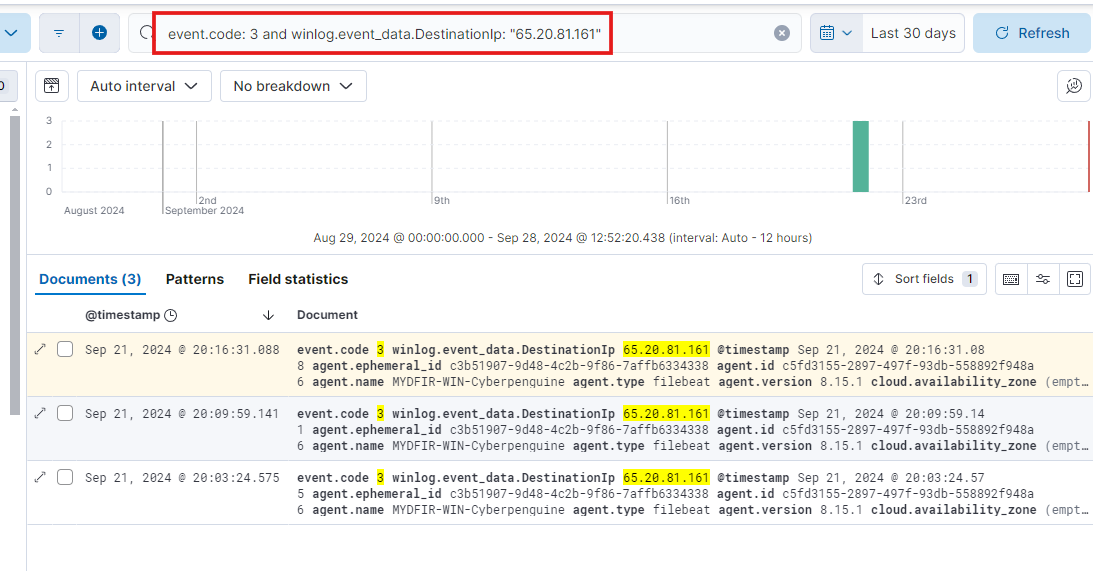
Notice that the executable file with port 80 and the PowerShell script have the same IP address, but with different ports (80 and 9999). This is suspicious and warrants further investigation.
Now that we have a suspicious destination IP, let’s copy it and search for more information on Discover. We’ll look for network connections associated with this IP.
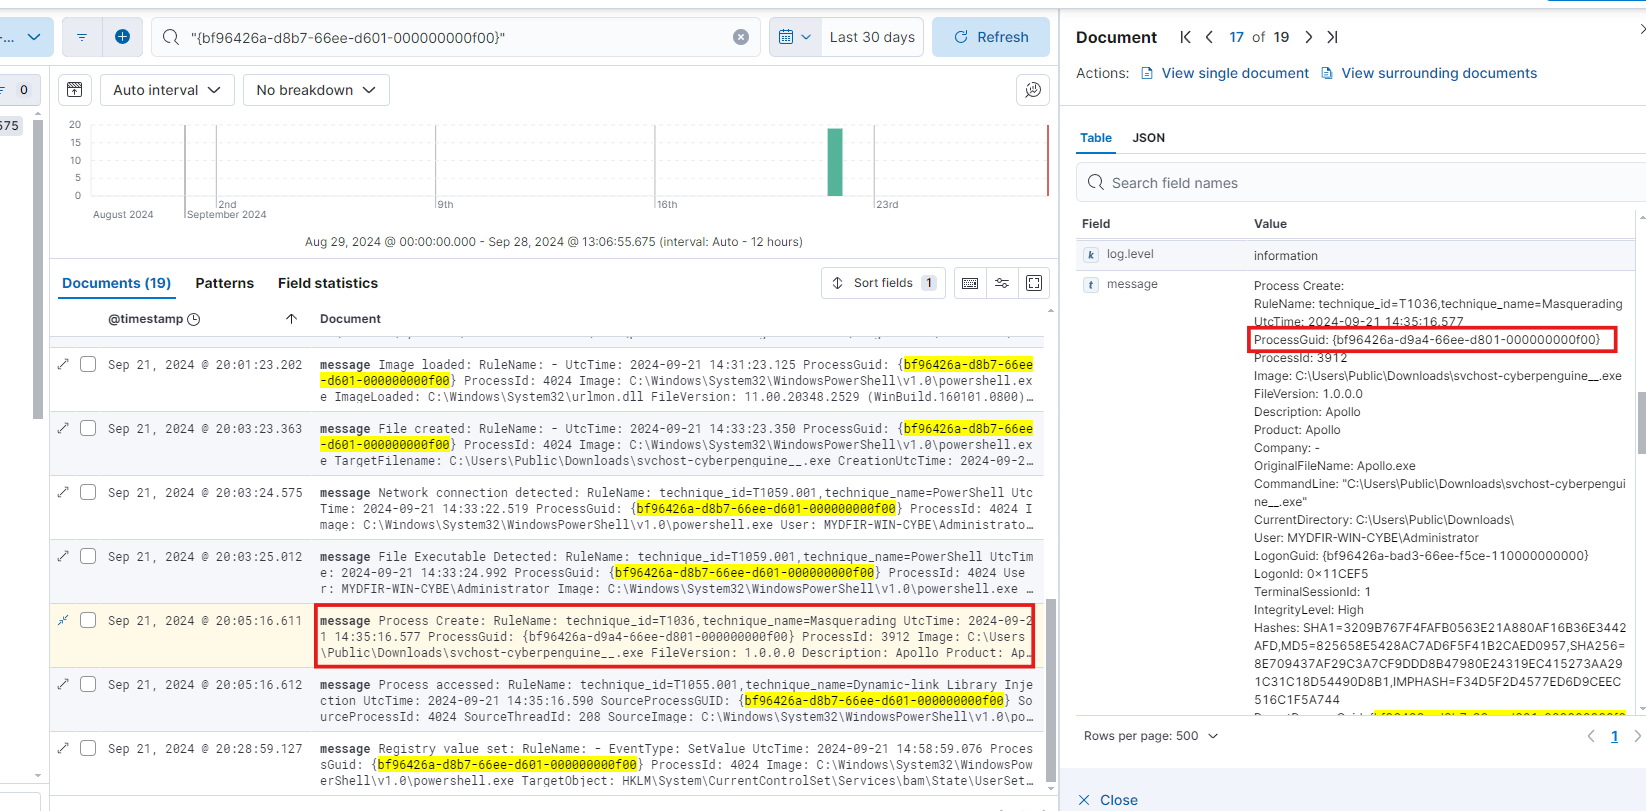
Now, let’s create a timeline. Pay attention to the timestamp and look for the ProcessGuid if you’re using Sysmon. This ProcessGuid will help you identify events related to a specific process. Use the ProcessGuid to search for the corresponding process.
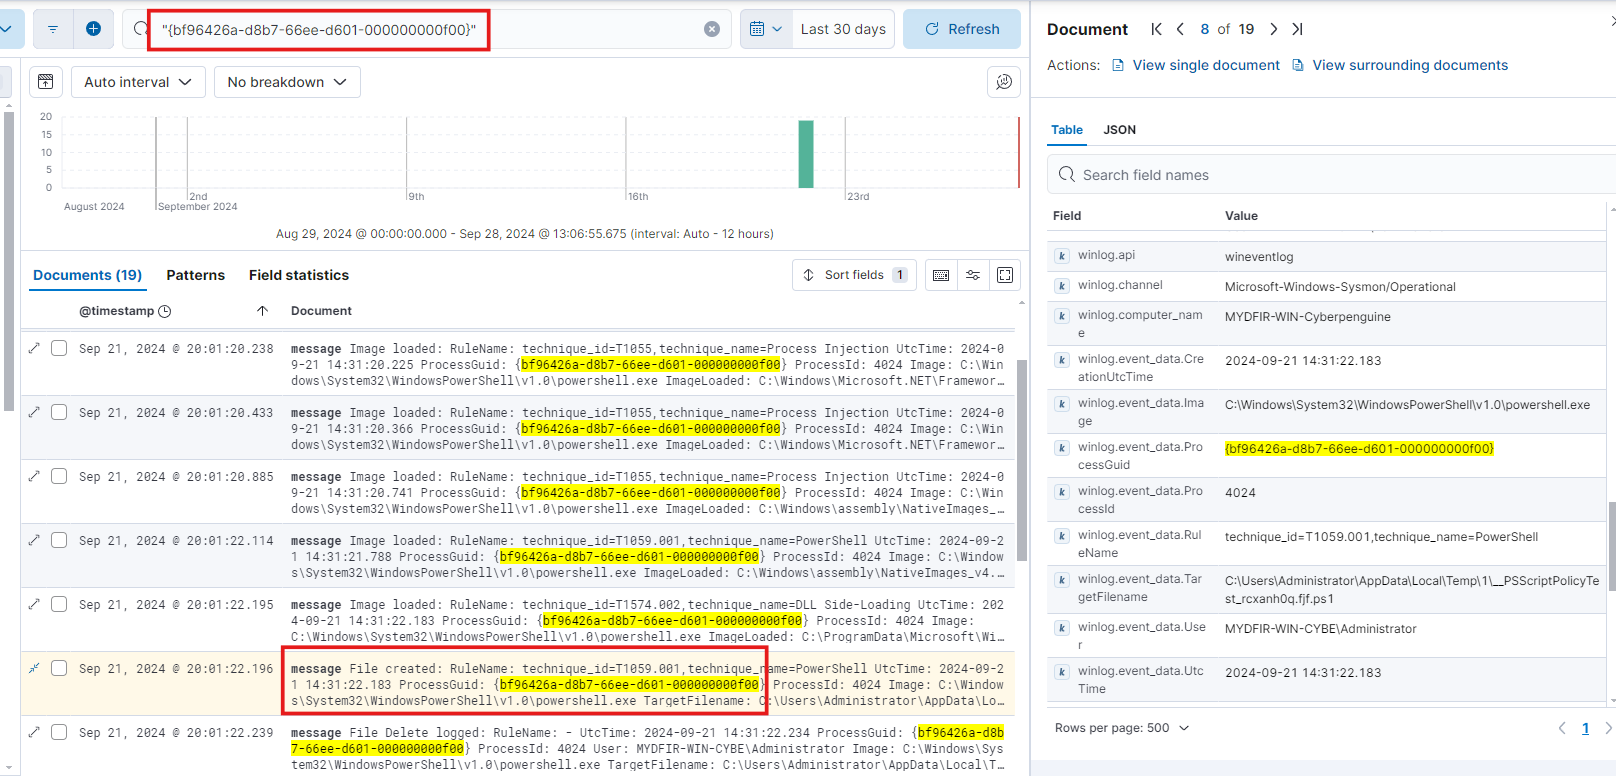
Numerous images were loaded, and the file names were identified. Next, you’ll find the ProcessGuid associated with each file. Remember, this ProcessGuid corresponds to the actual executable file.
By retracing the processes, we discovered that PowerShell was executed from an unexpected location. Using the ProcessGuid linked to PowerShell, we identified the file that was executed.
Now, take the ProcessGuid from the created process and search for it.
Creating a report by retracing all the steps can be time-consuming. You can try this on your own, just like I suggested at the beginning.
Now, where do we find the files that Mythic downloaded using its agent? We should focus on network and endpoint telemetry.
To practice analyzing SIEM alerts, I recommend the platform called Let’s Defend. It’s a great place to hone your skills.
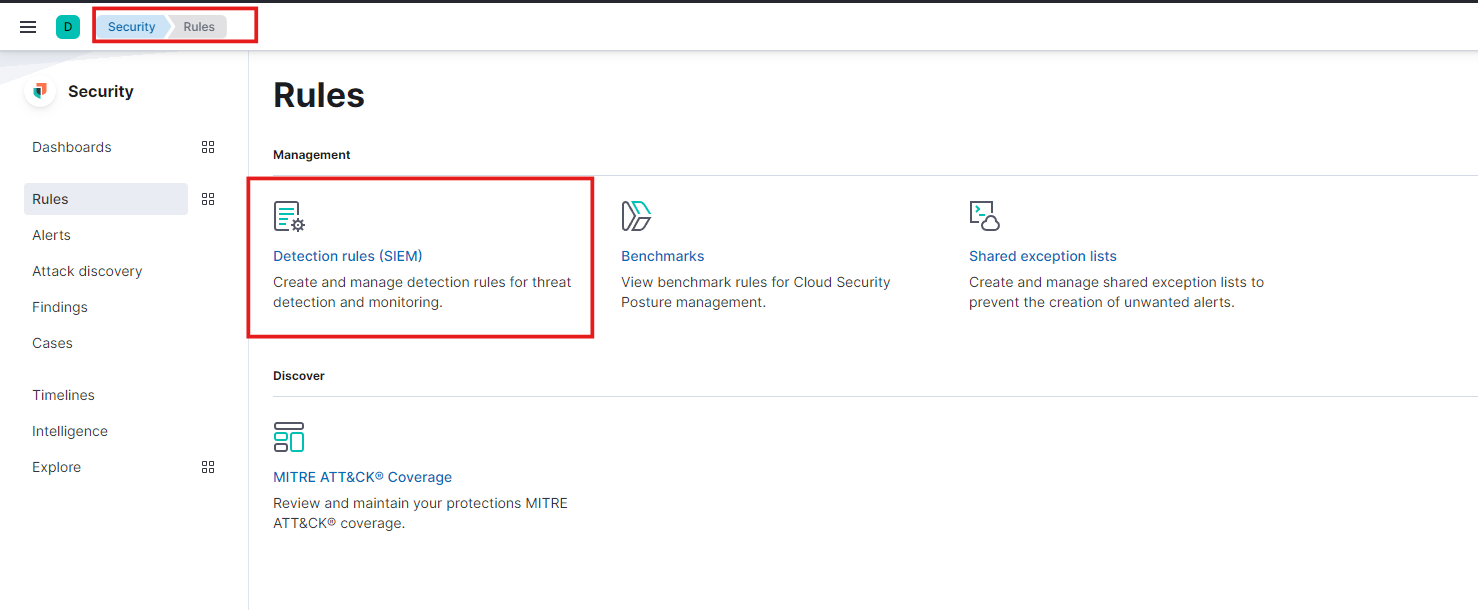
To wrap things up, let’s create a rule similar to the one we made for Brute Force Attacks. Head over to the ‘Rules’ section under ‘Security’ and select ‘Detection rules (SIEM).’ Let’s get started!
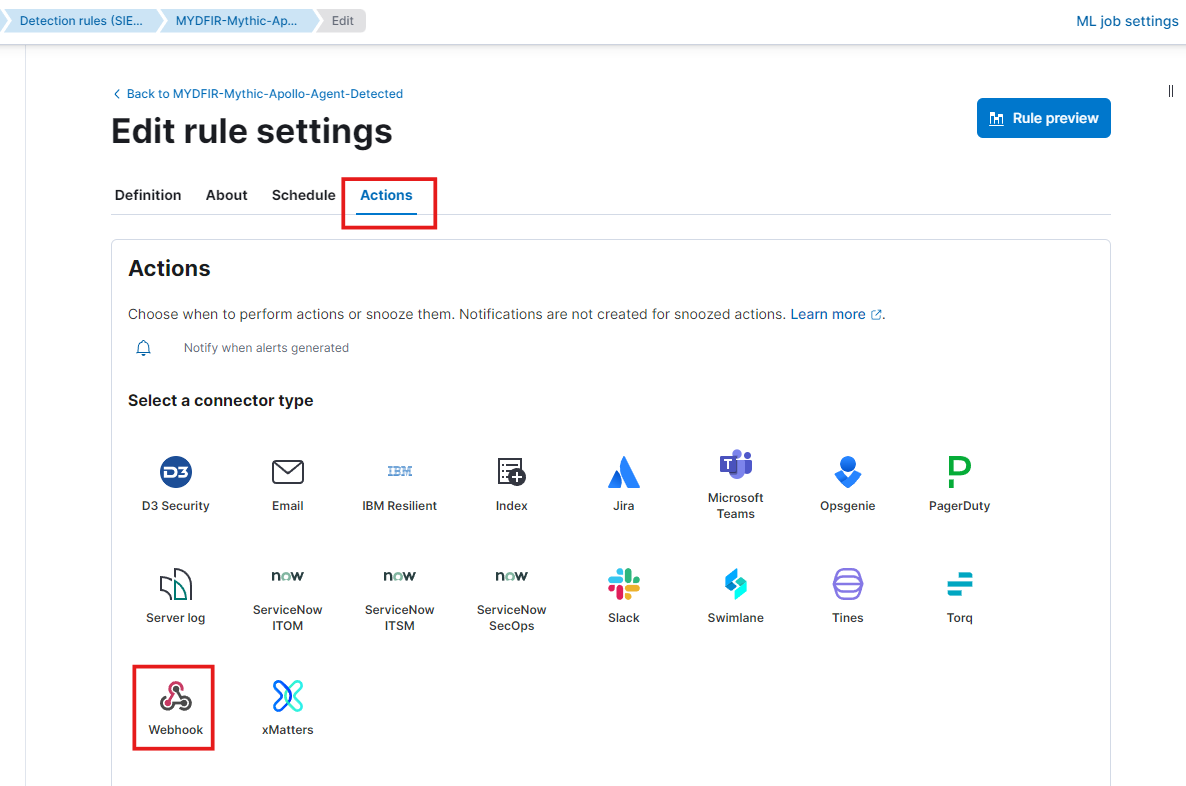
Select the ‘Mythic-Apollo-Agent-Detected’ rule, then edit its settings. Under ‘Action,’ choose ‘Webhook.’

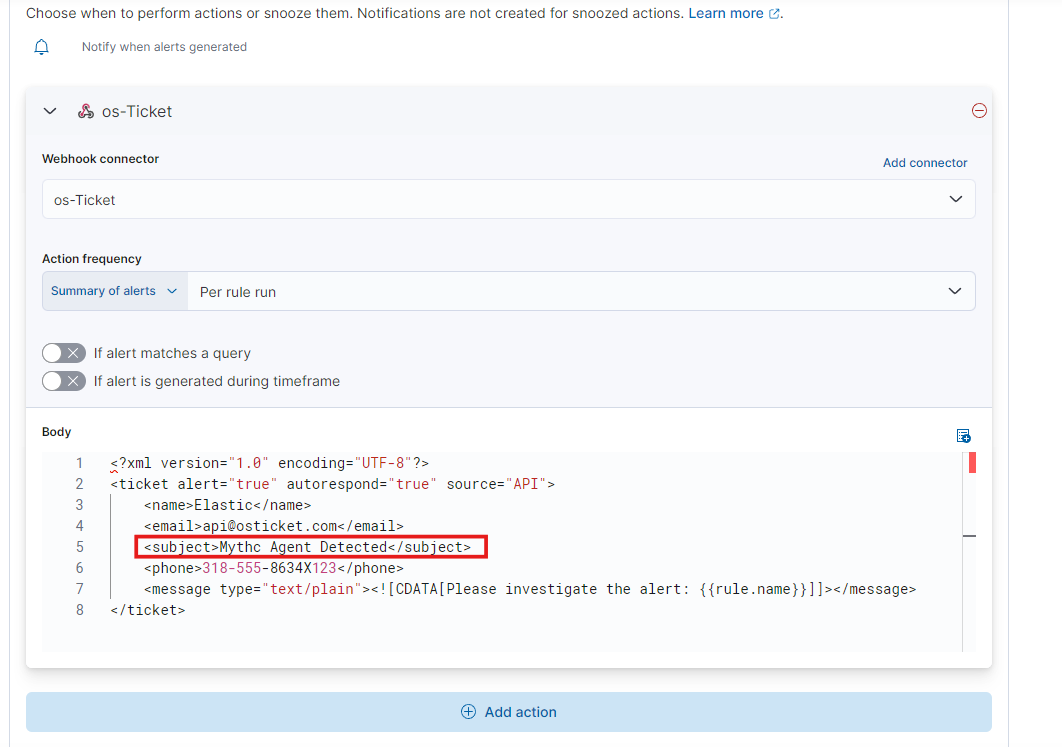
Enter the body of the XML payload and remove any attachments. Save your changes.
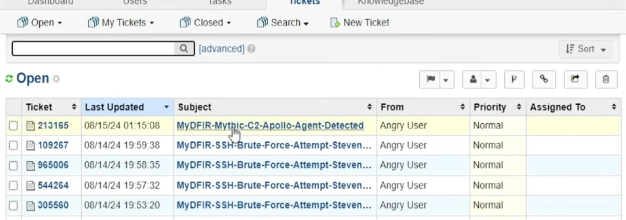
The ticket will be displayed in OSticket.
From here, you can add comments, assign the ticket to yourself, and resolve the issue before closing it. Just like we did with the RDP and SSH brute force attack tickets in previous blogs.
Just two more days to conquer the 30-day MYDFIR SOC Analyst Challenge! I’m hooked, and I’m not stopping here. So, let me know what you think of these blogs. Any ideas for how to make them even better or topics you’d like me to tackle? Your feedback is my fuel!