Day-3 Elasticsearch Setup

For this configuration, I utilized Vultr cloud service. To create the instance, I established a VPC in nearest region.

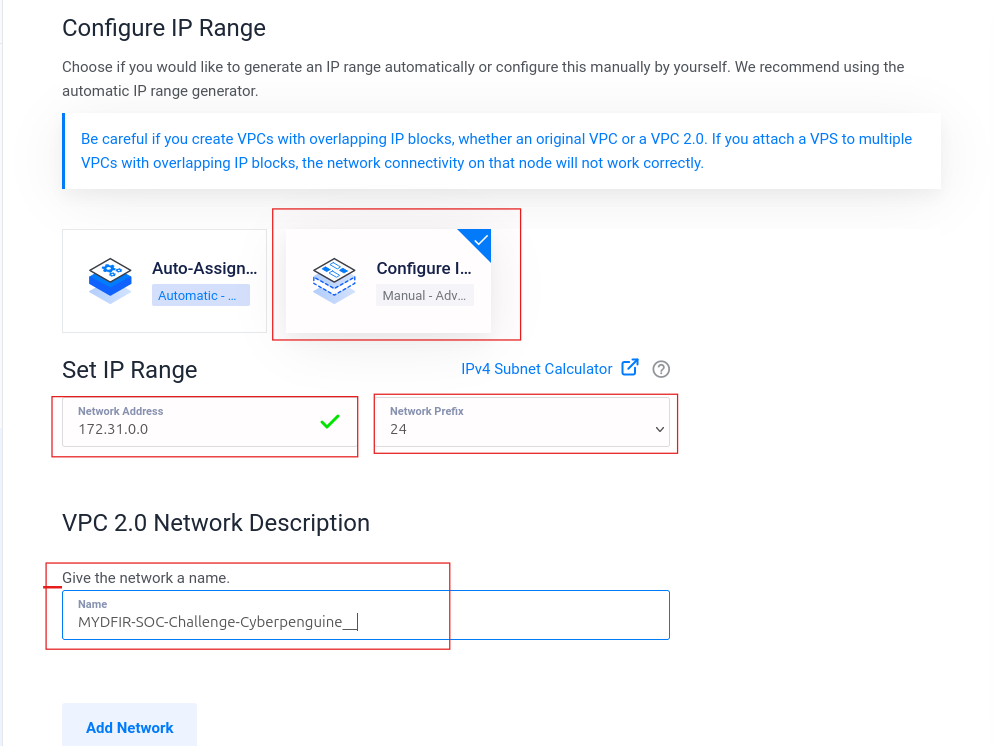
Configure the network settings. I used IP range 172.31.0.0/24. Give a name to your VPC network and add the network by clicking on Add Network.
Deploy the new server

Choose type as dedicated CPU and same region as VPC.

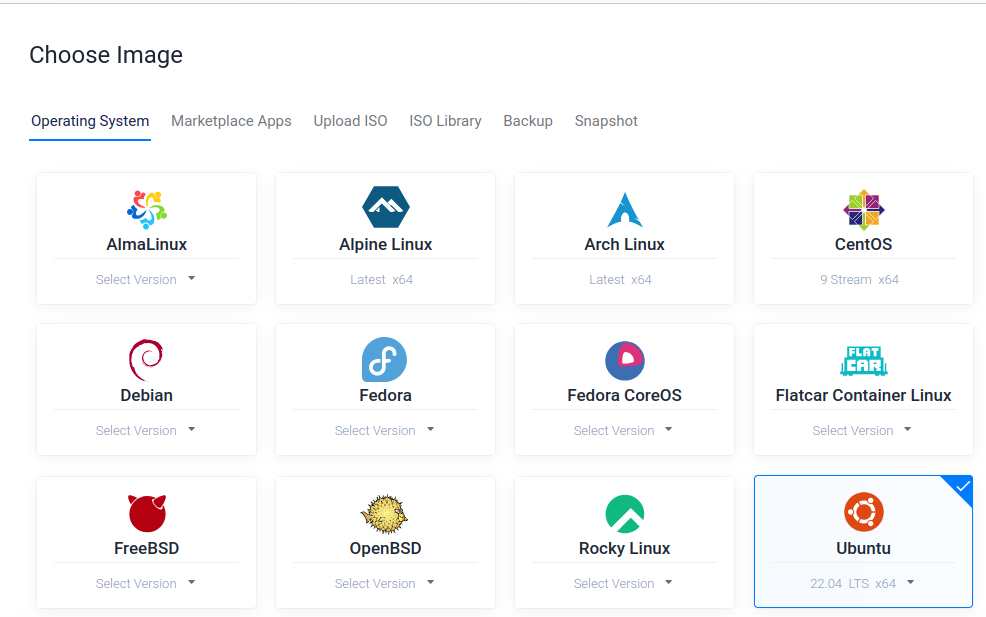
Choose Ubuntu 22.04 image for machine.
Choose the plan suitable for elasticsearch

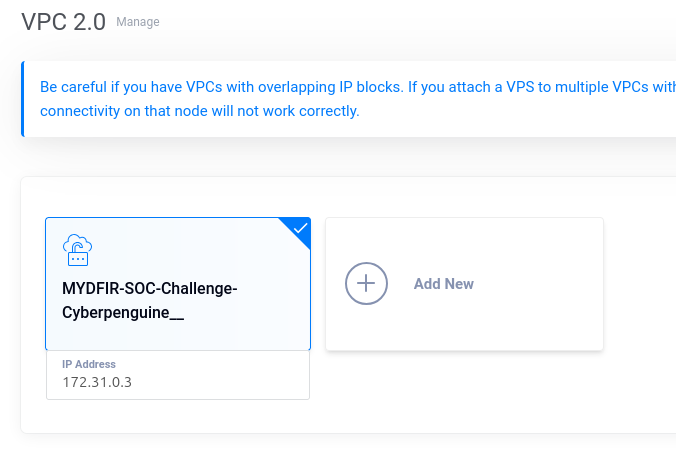
Choose the VPC we created for the elasticsearch server
Don’t need the ssh key here for now, but give a name to your server
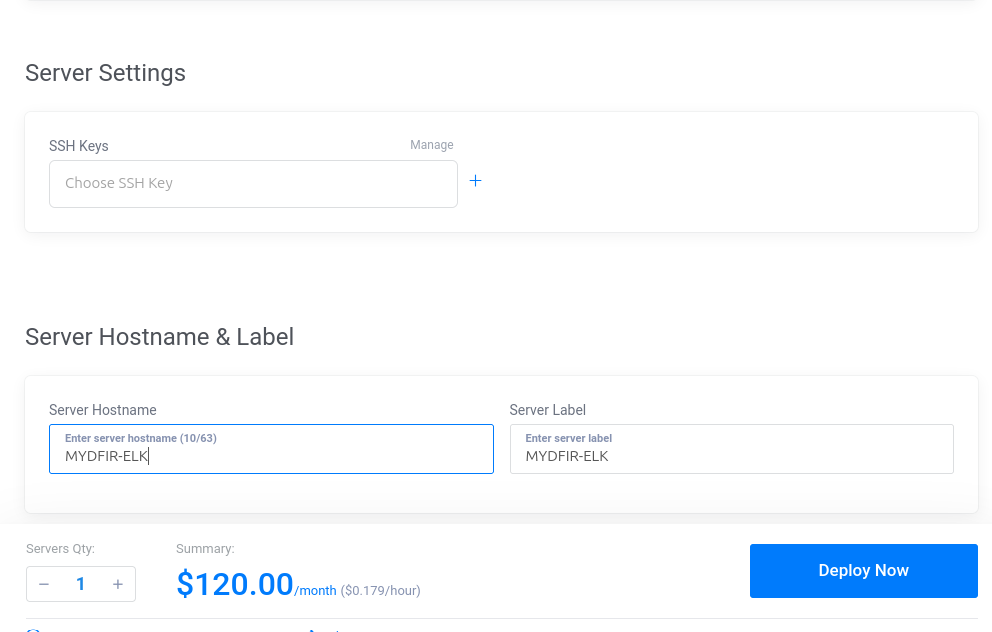
Click the Deploy Now button and we successfully deployed our server.
Install Elasticsearch:
Update and upgrade packages:
sudo apt-get update && apt-get upgrade -y
The Elasticsearch DEB package for x86_64 architecture can be downloaded directly from the official Elasticsearch website.

Download Elasticsearch DEB package:
wget <download link>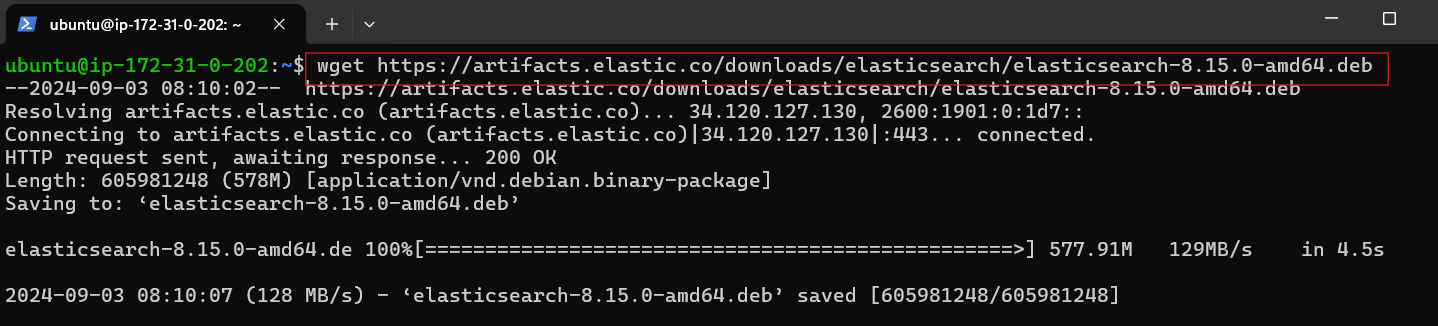
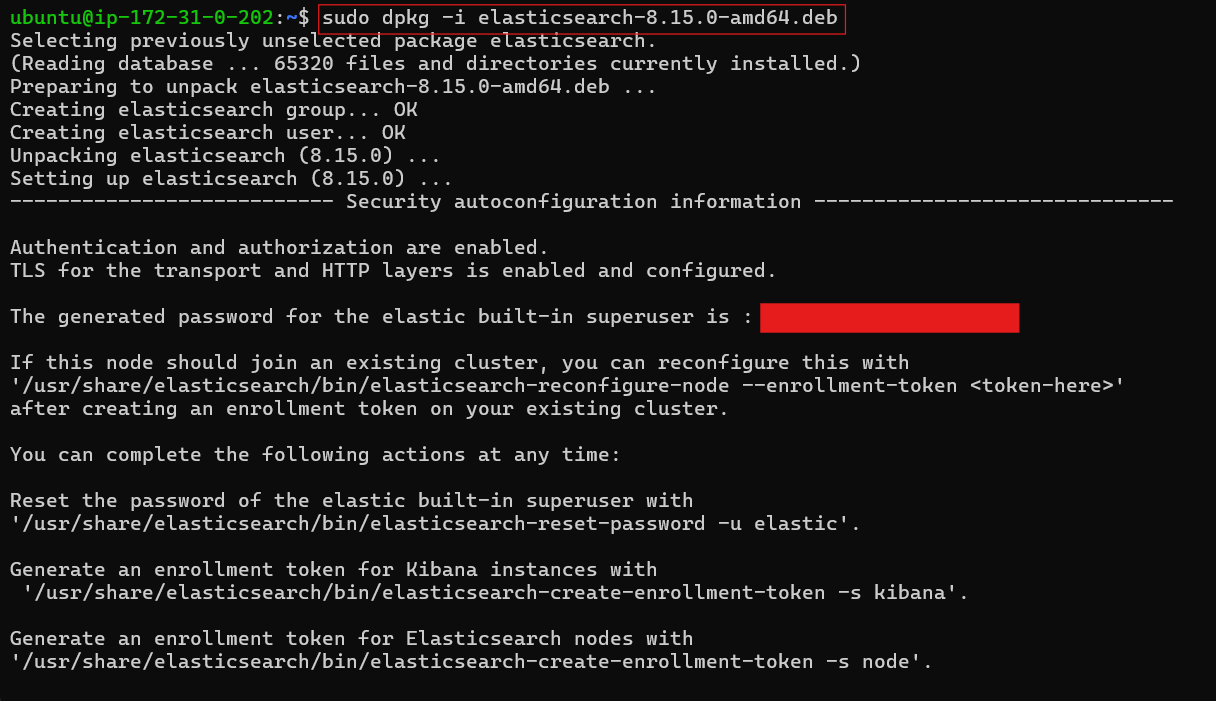
Install Elasticsearch:
sudo dpkg -i <elasticsearch.deb>After installing the Elasticsearch DEB package, important security configuration details will be displayed on the terminal. Make sure to record these settings, including the Elasticsearch password. This information is crucial for resetting passwords if needed.


Configure Elasticsearch:
Navigate to the configuration file:
cd /etc/elasticsearch
Edit the configuration file:
nano elasticsearch.ymlBy default, Elasticsearch is only accessible from the local host. For enhanced security and remote access, configure the network host setting to your system’s public IP address.
Uncomment and modify
network.hostandhttp.portsettings to allow remote access.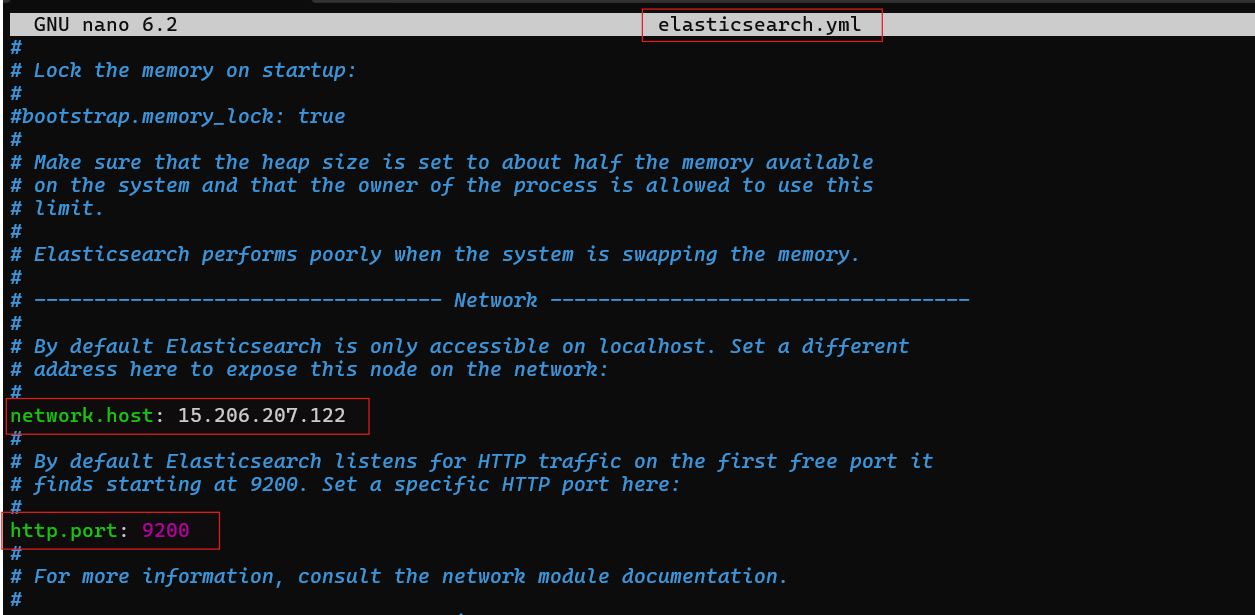
Start Elasticsearch Service:
To access Elasticsearch, we must activate and start the service after making the necessary changes.
- Reload systemd daemon:
systemctl daemon-reload - Enable Elasticsearch service at boot:
systemctl enable elasticsearch.service - Start Elasticsearch service:
systemctl start elasticsearch.service

Verify Service Status:
- Check if Elasticsearch is running:
systemctl status elasticsearch.service